My blog is moving!

I migrated to my website from WordPress.com. Hopefully this will give me better control over the blog’s appearance and add more features.

Thanks to all who read this blog!

Please use this address in the future:

http://spearhead1944.com/blog/

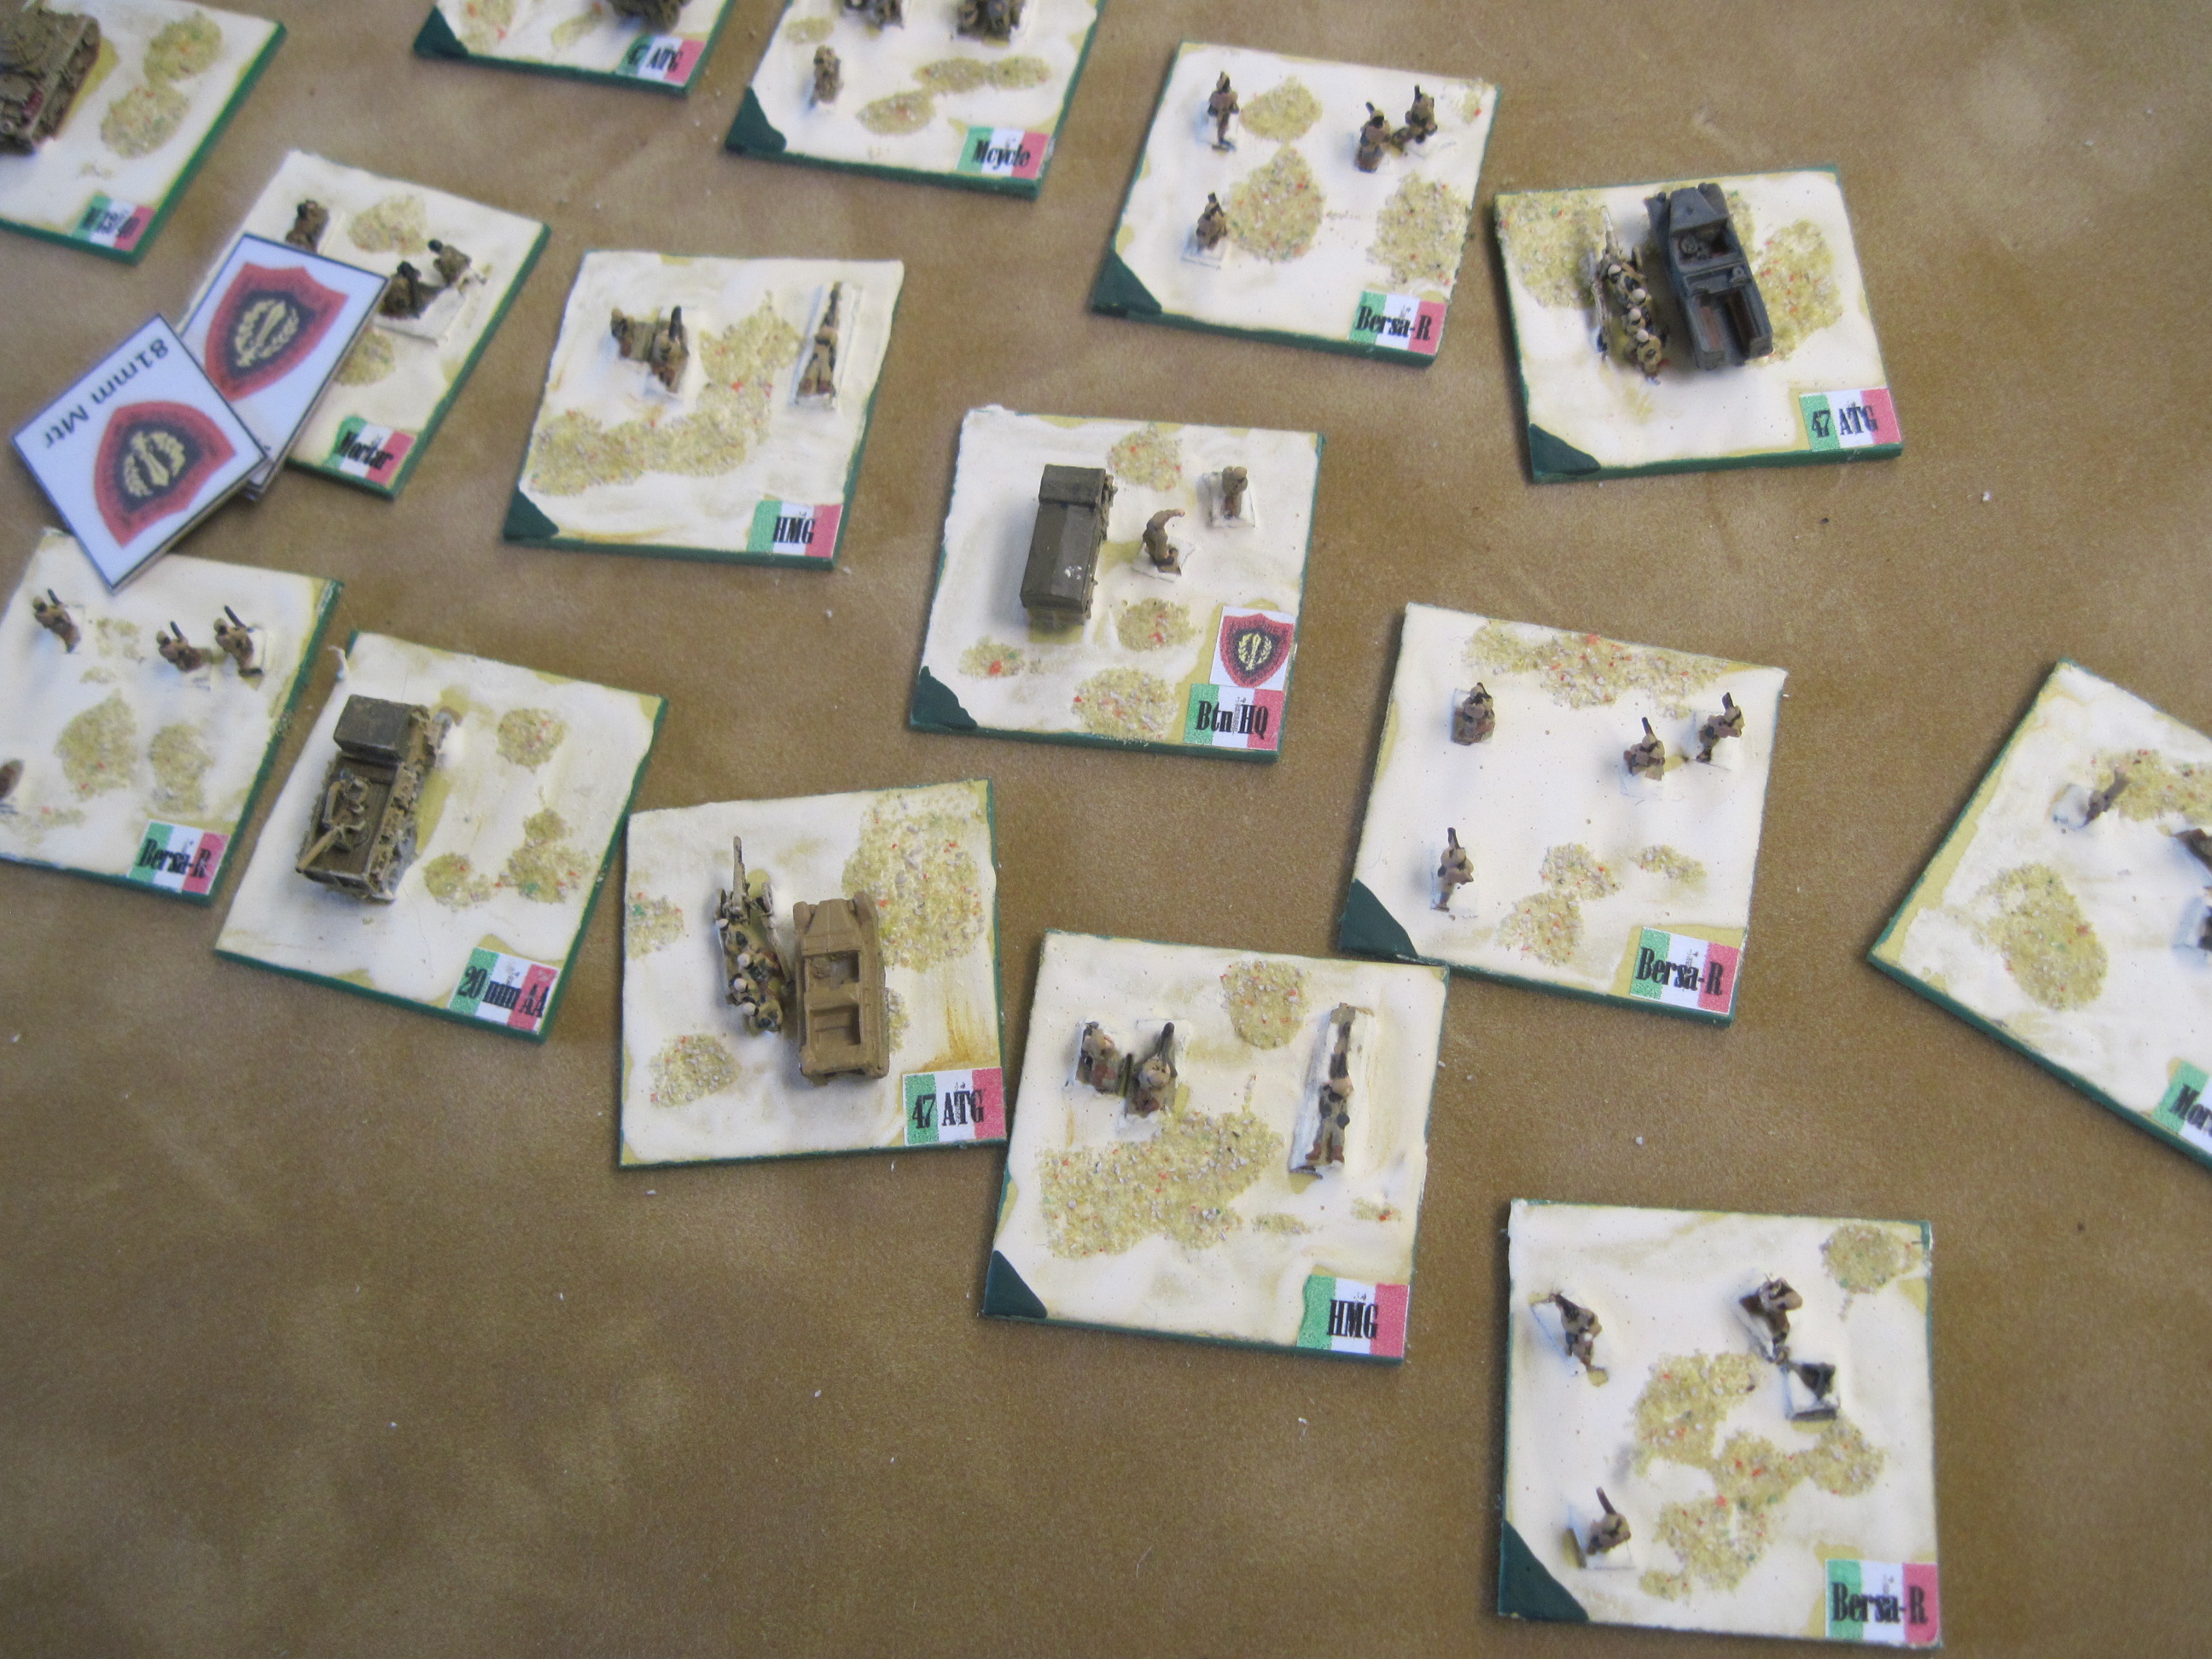
Tyson brought his Germans in to meet my Brits in practice for our upcoming tournament in Pittsburgh. My list from Blitzkreig Book:

BritInfEW  It’s a pretty balanced list, I think. Eight platoons for deployment with two recce platoons, good artillery, and a Heavy Tank platoon for a lotta lovin’ for the Germans.

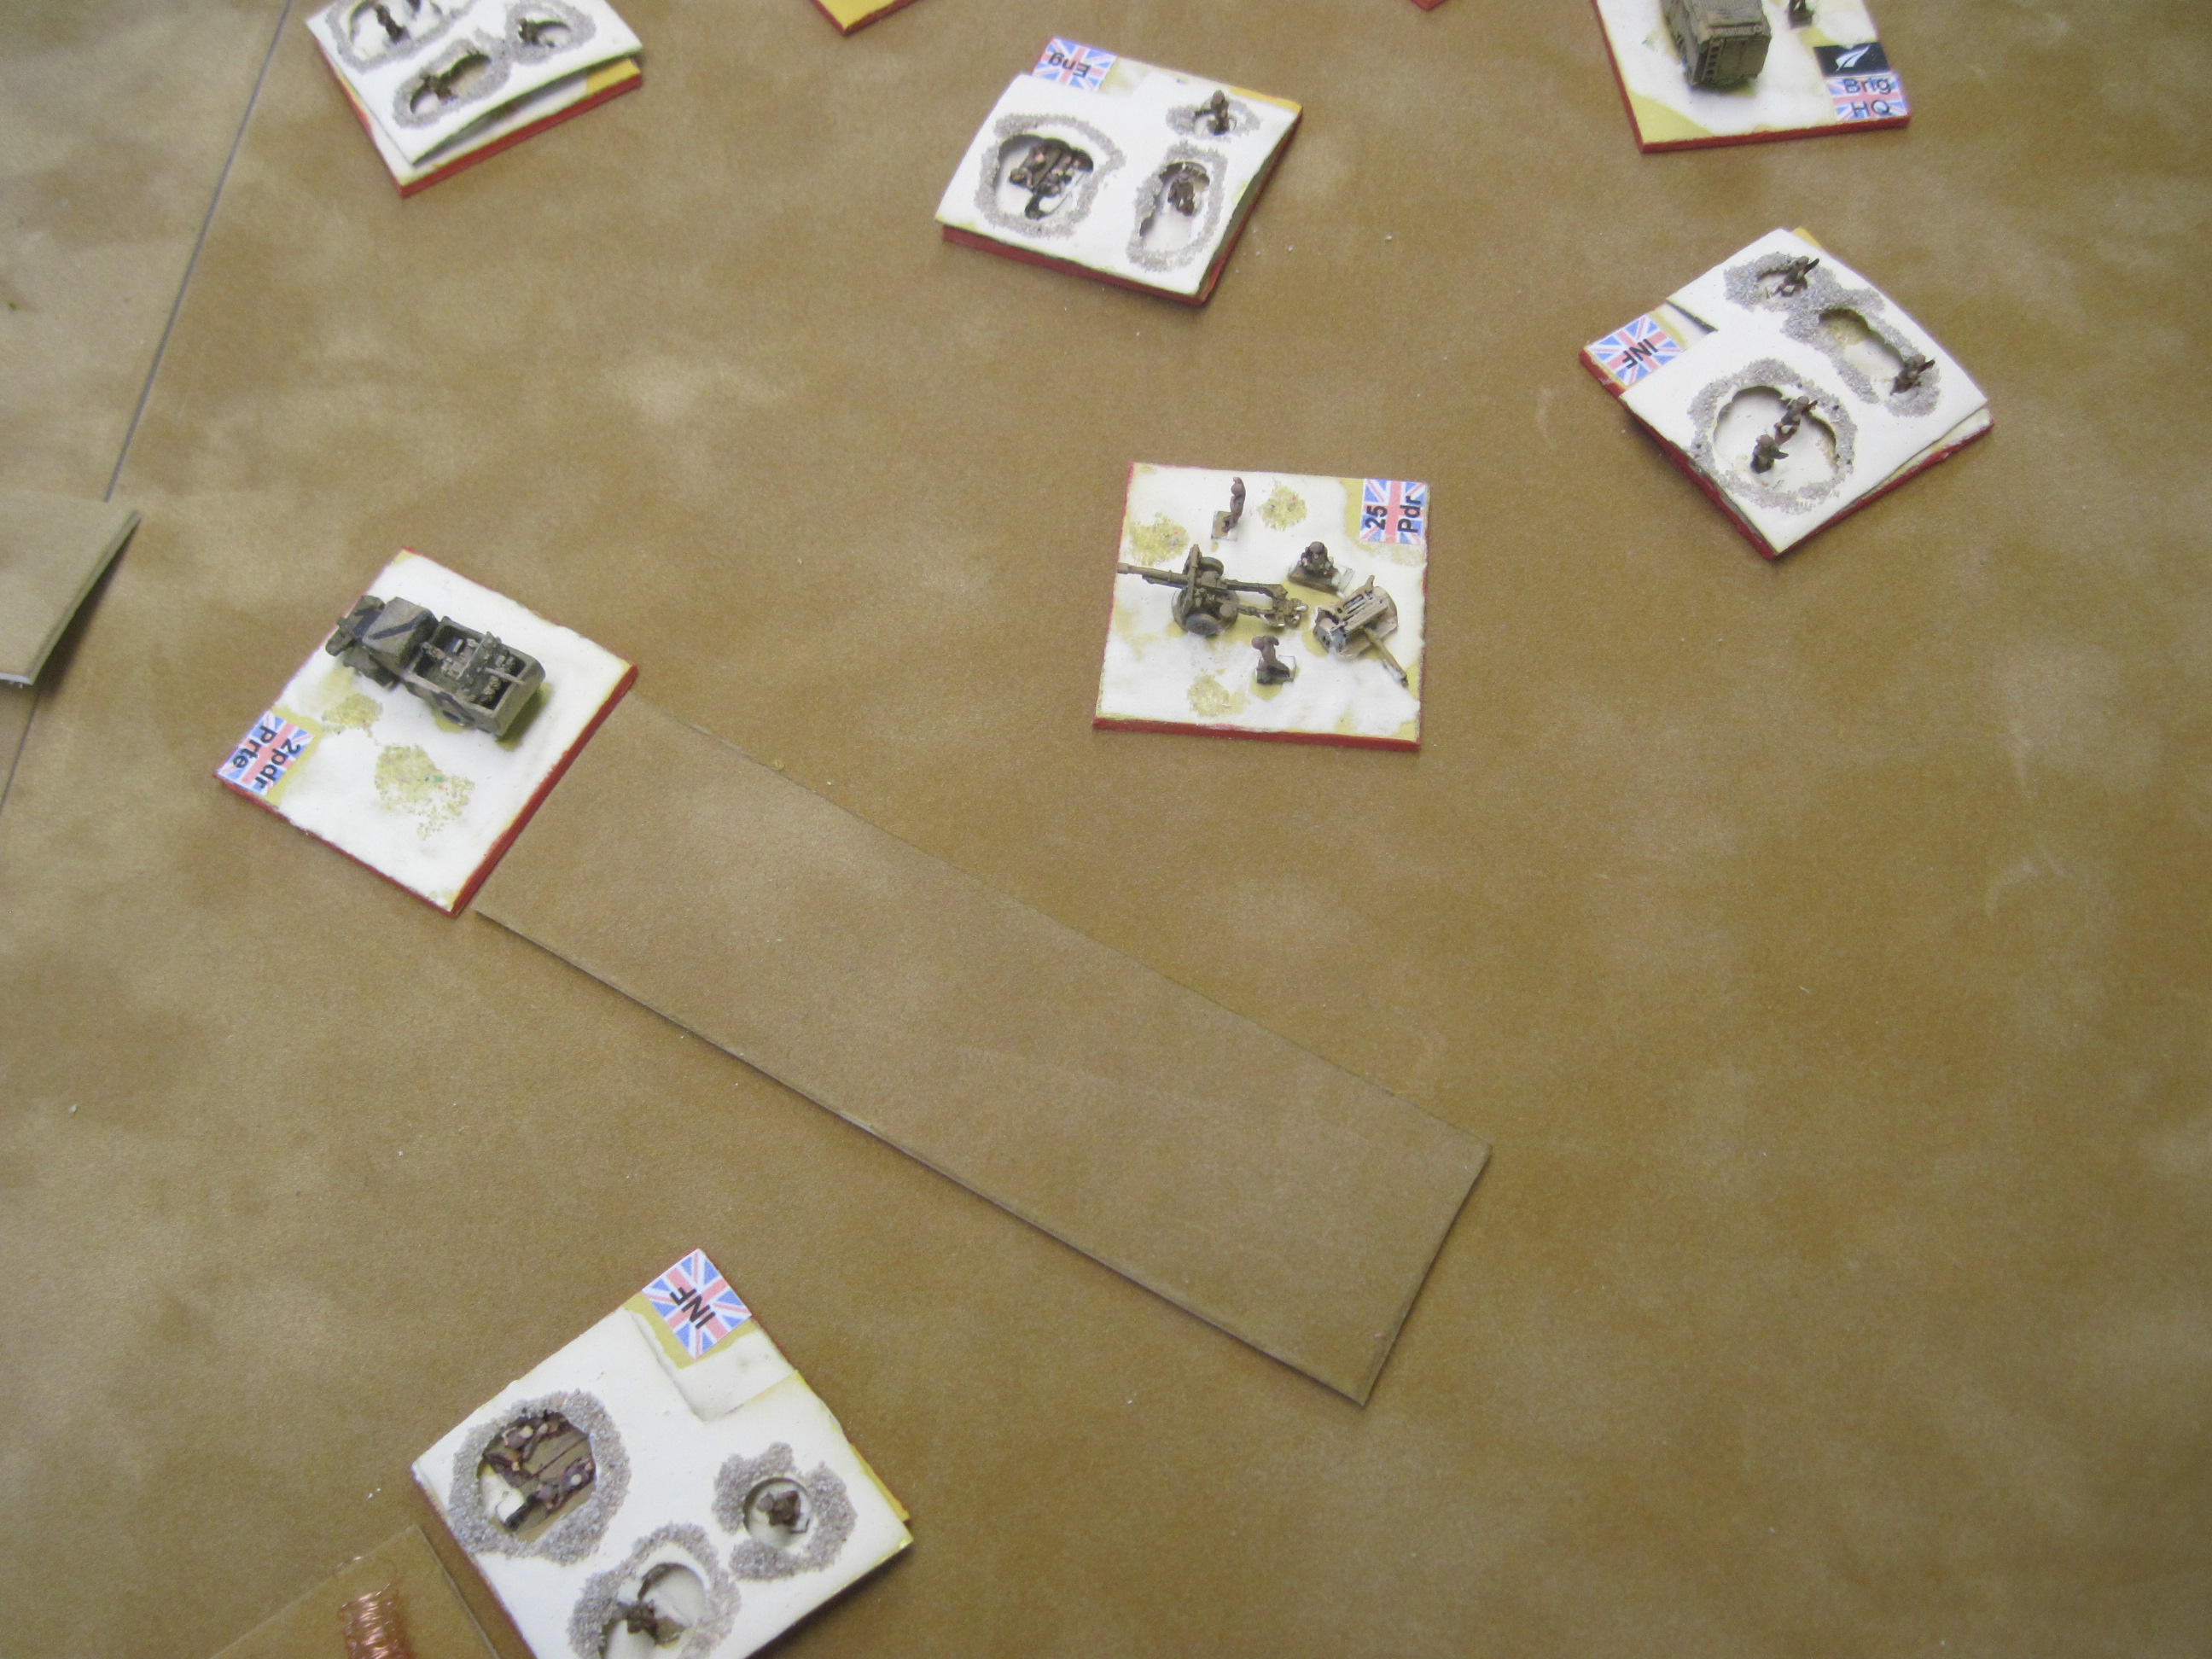
Early War doesn’t allow the Brits “Mike targets” for the artillery, but the AT factor of 8 on a turntable based platform that can touch enemy at 24 inches is STILL impressive.


IMG_3794
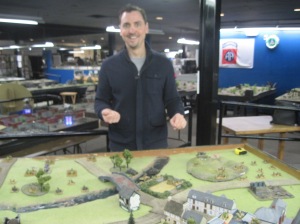
Tyson, the German commander.


The German list was from Barbarossa:

TysonList


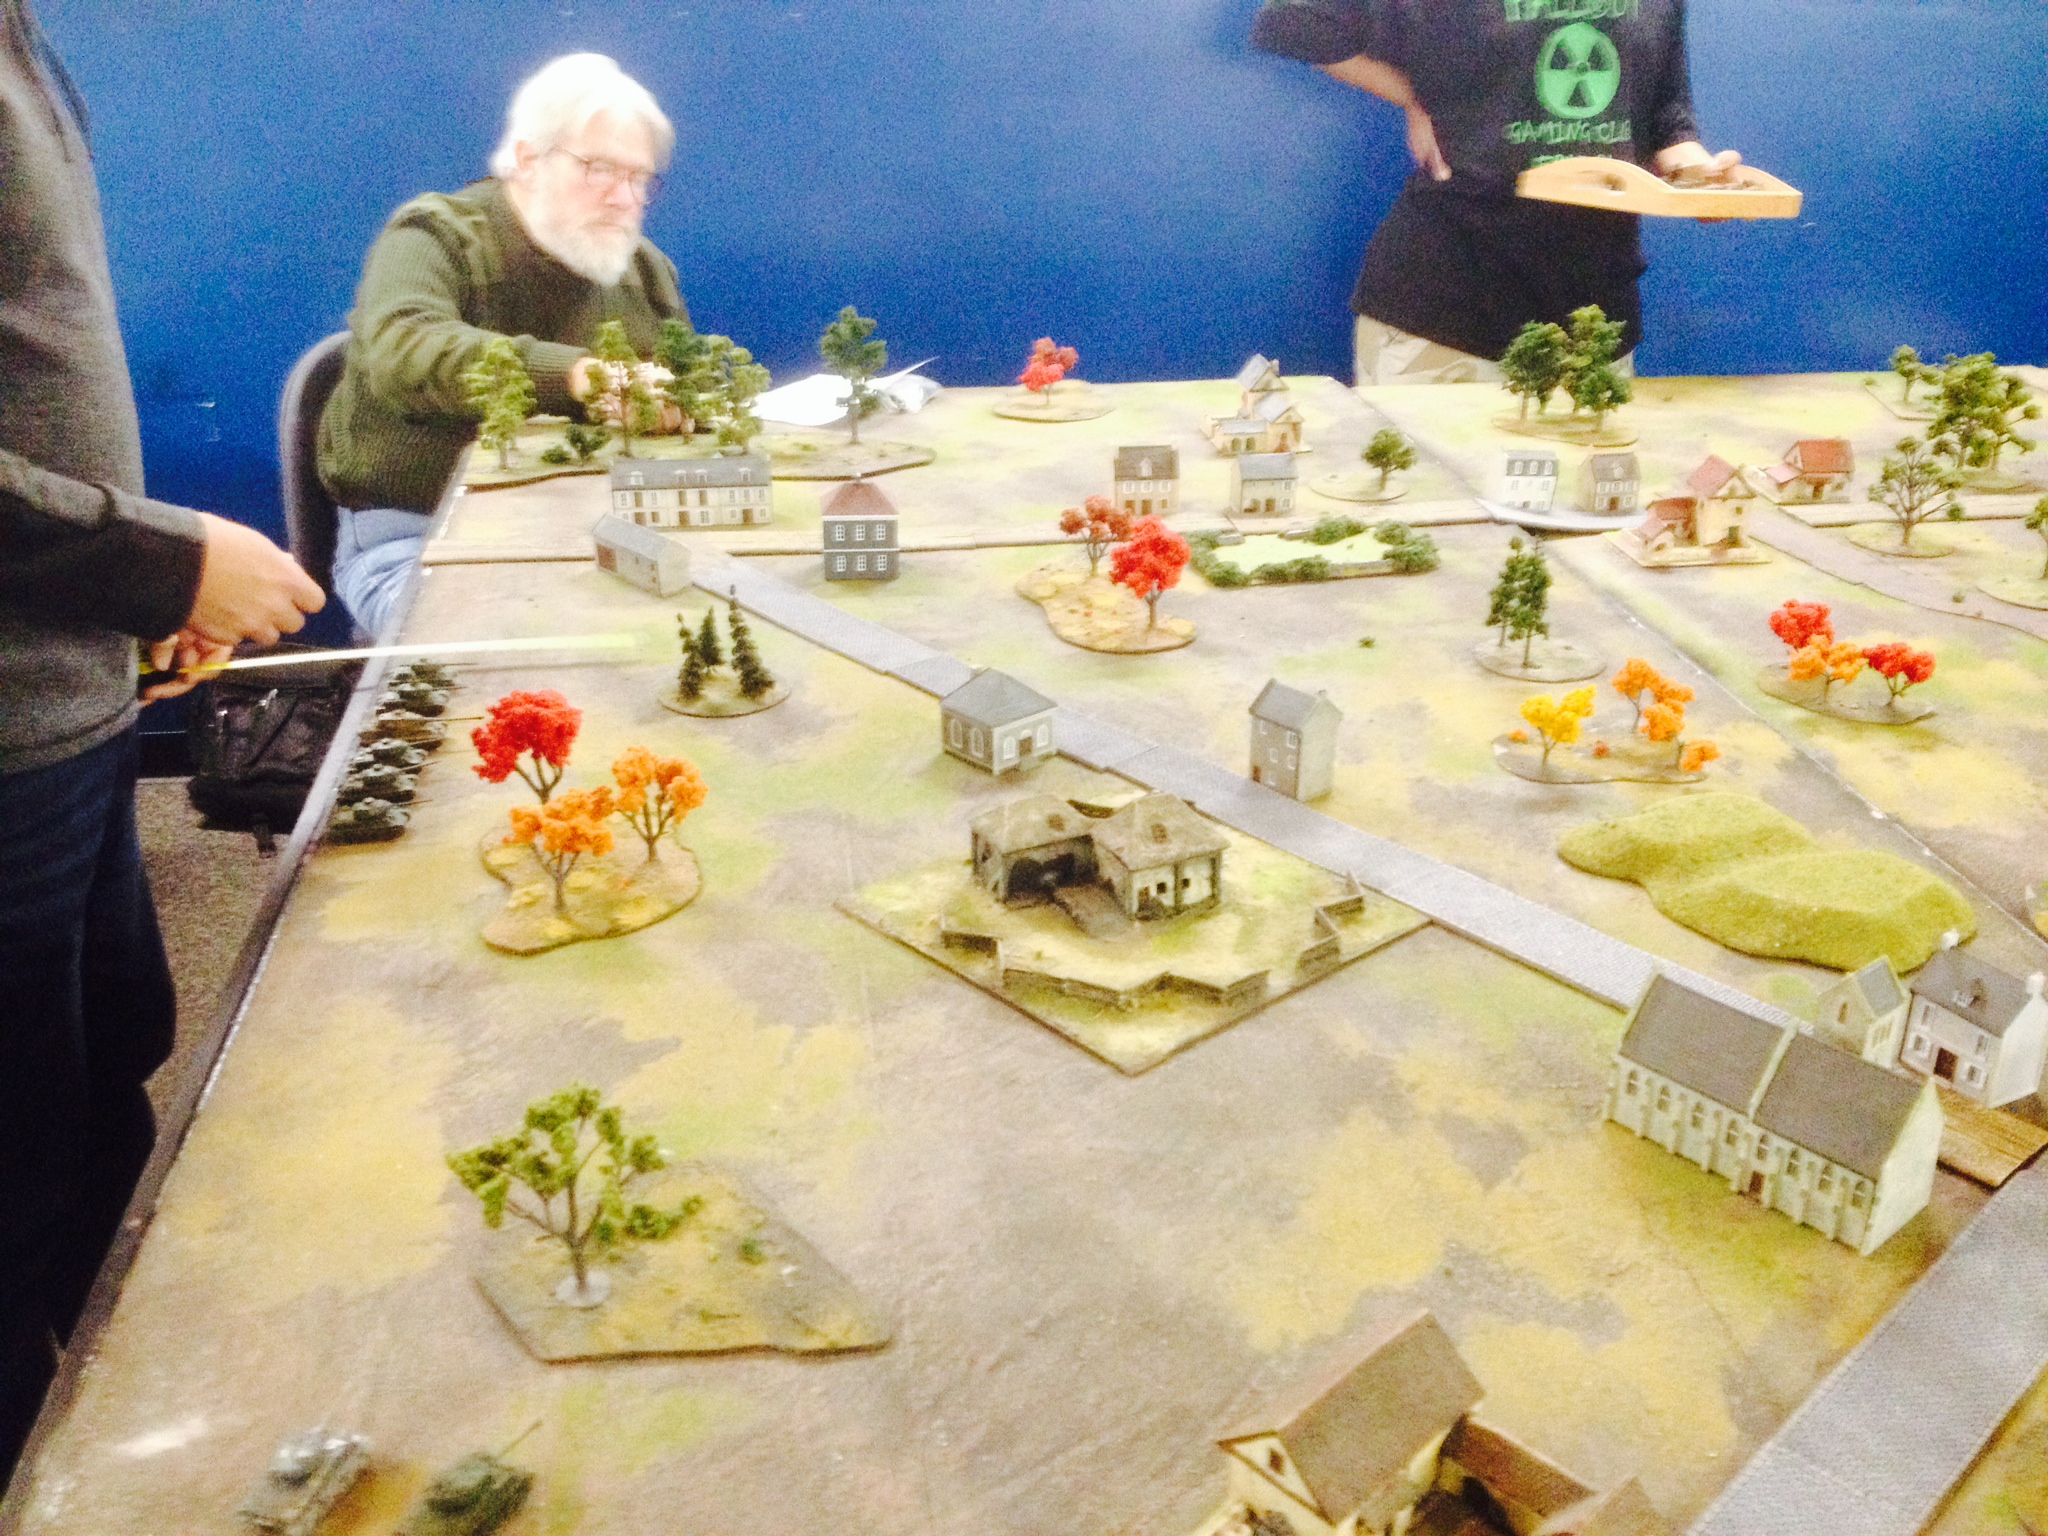
We rolled up Free-for-all, and then set up. I’ll confess ahead of time that we played rather slowly as we were both getting more familiar with our forces and how they interact. We discussed options along the way so the game went more slowly than we both are used to. Two and a half hours goes fast!

IMG_3786 
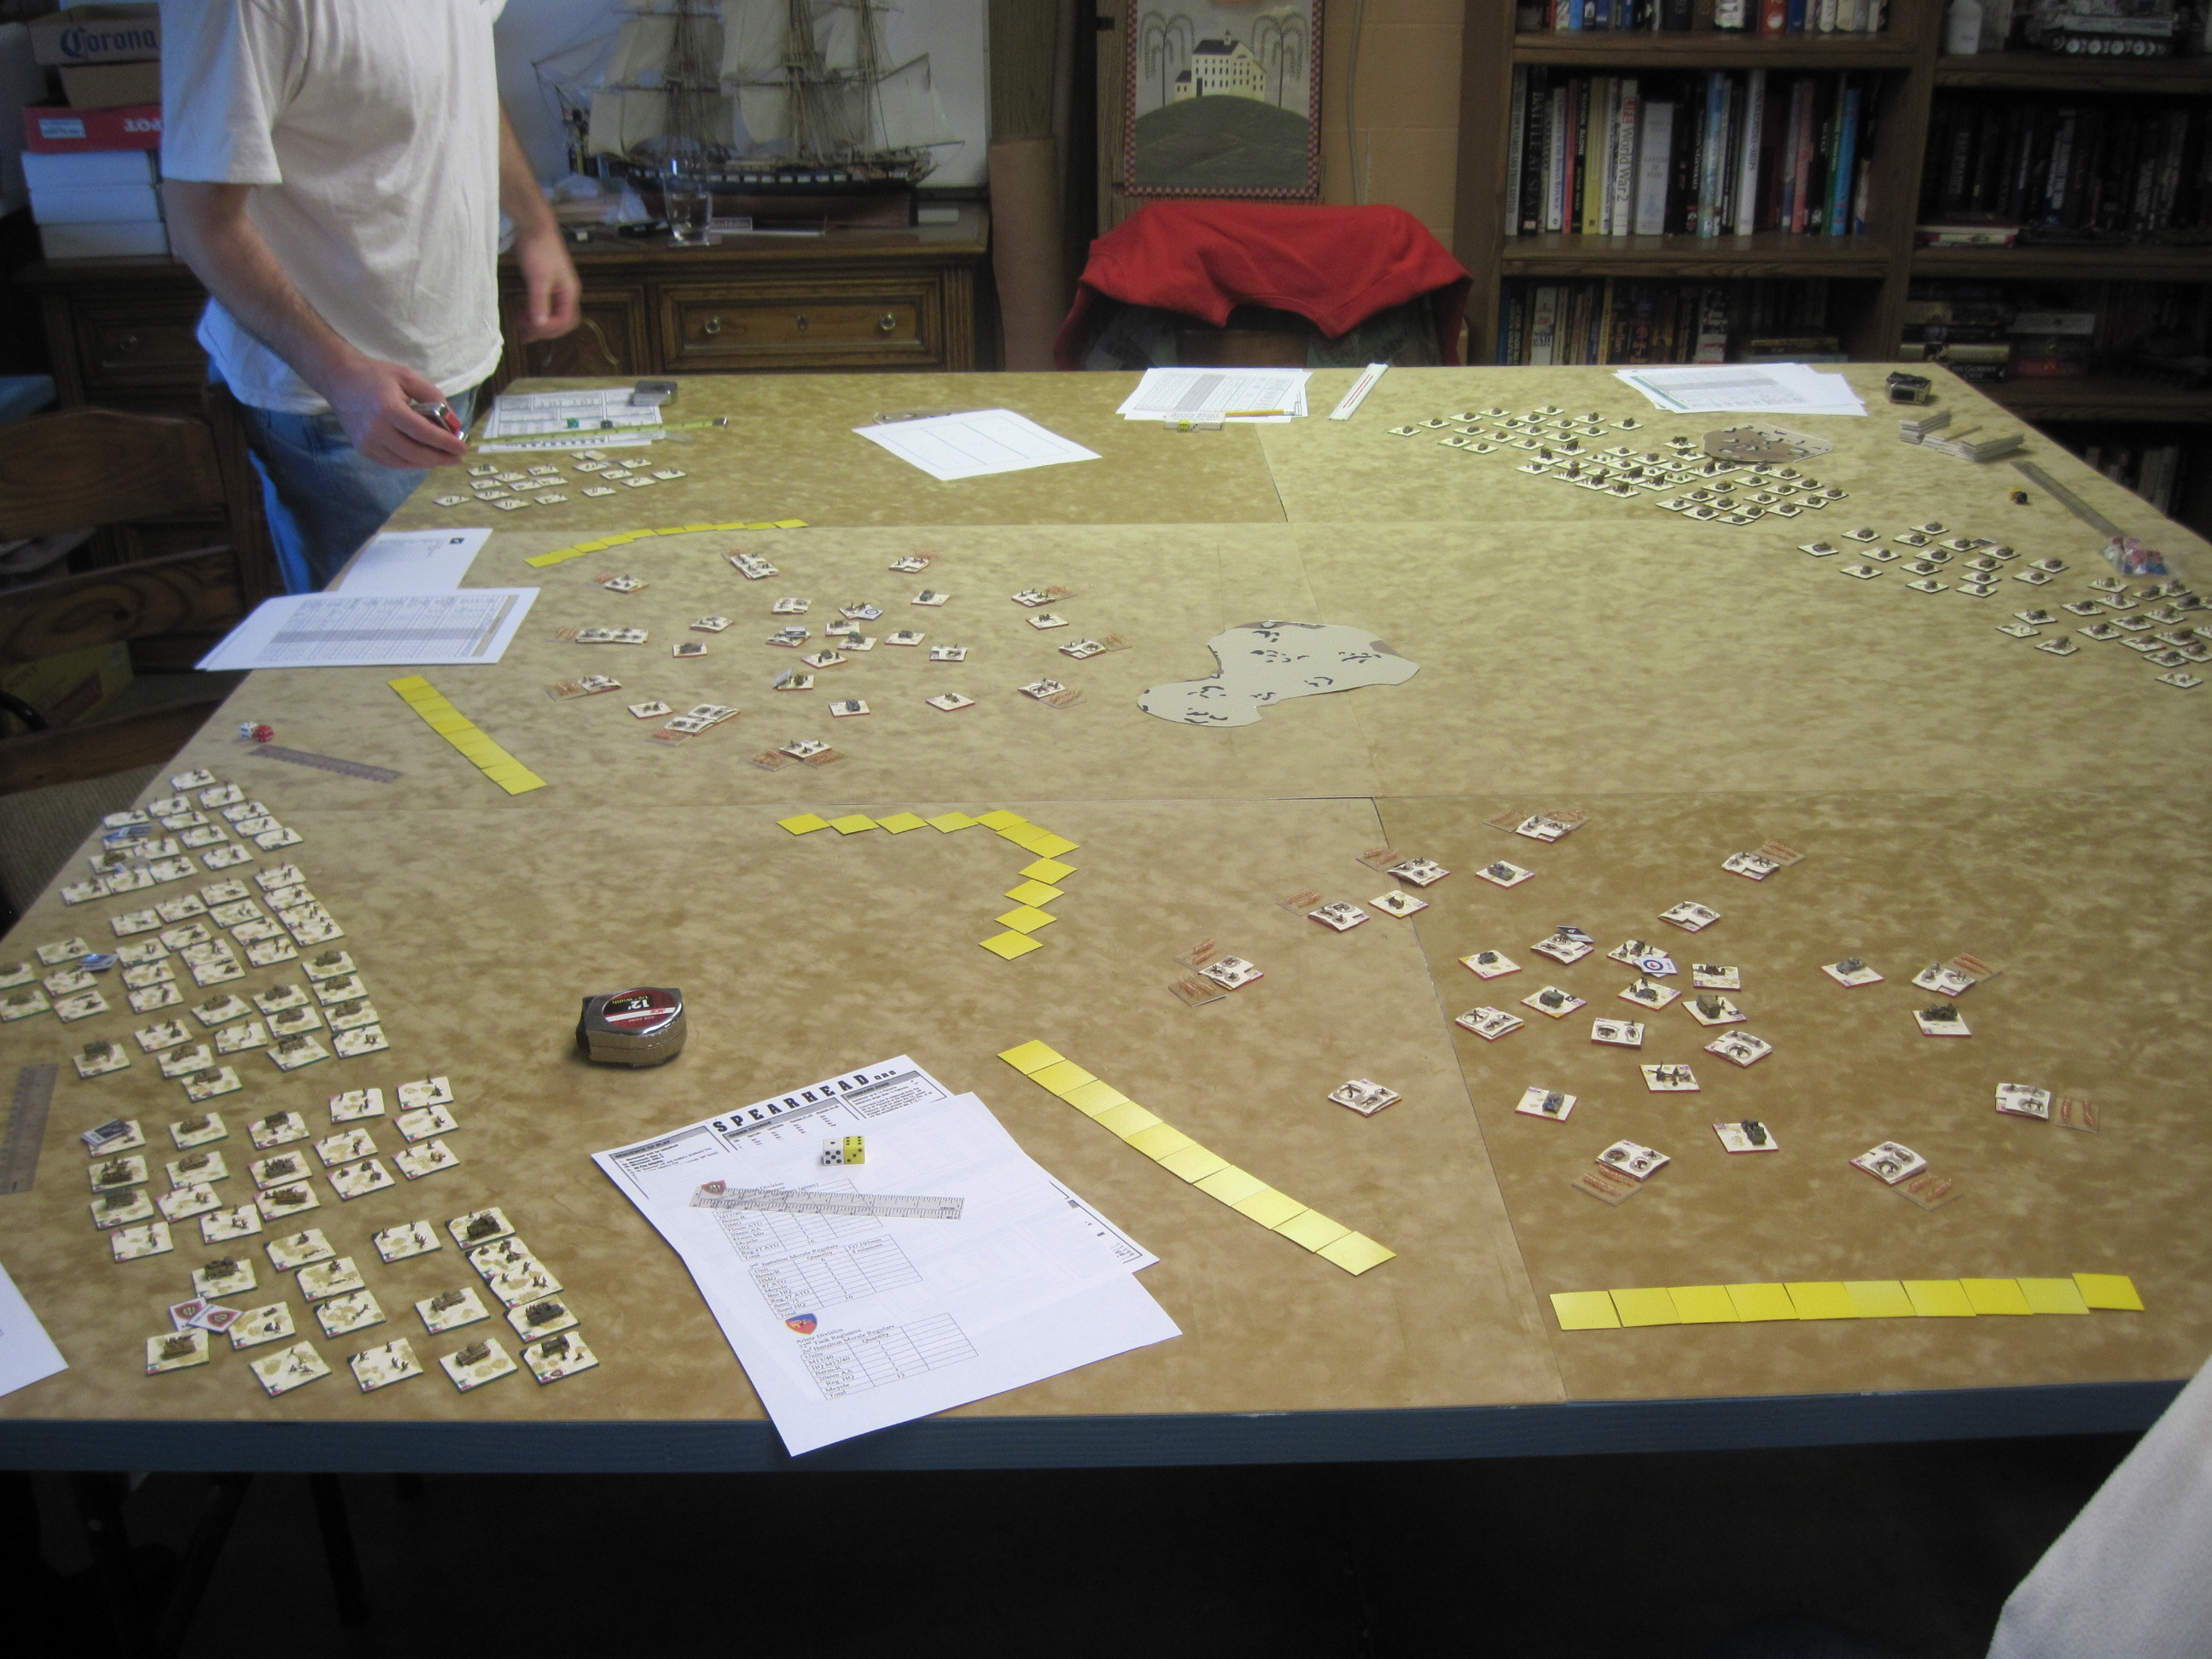
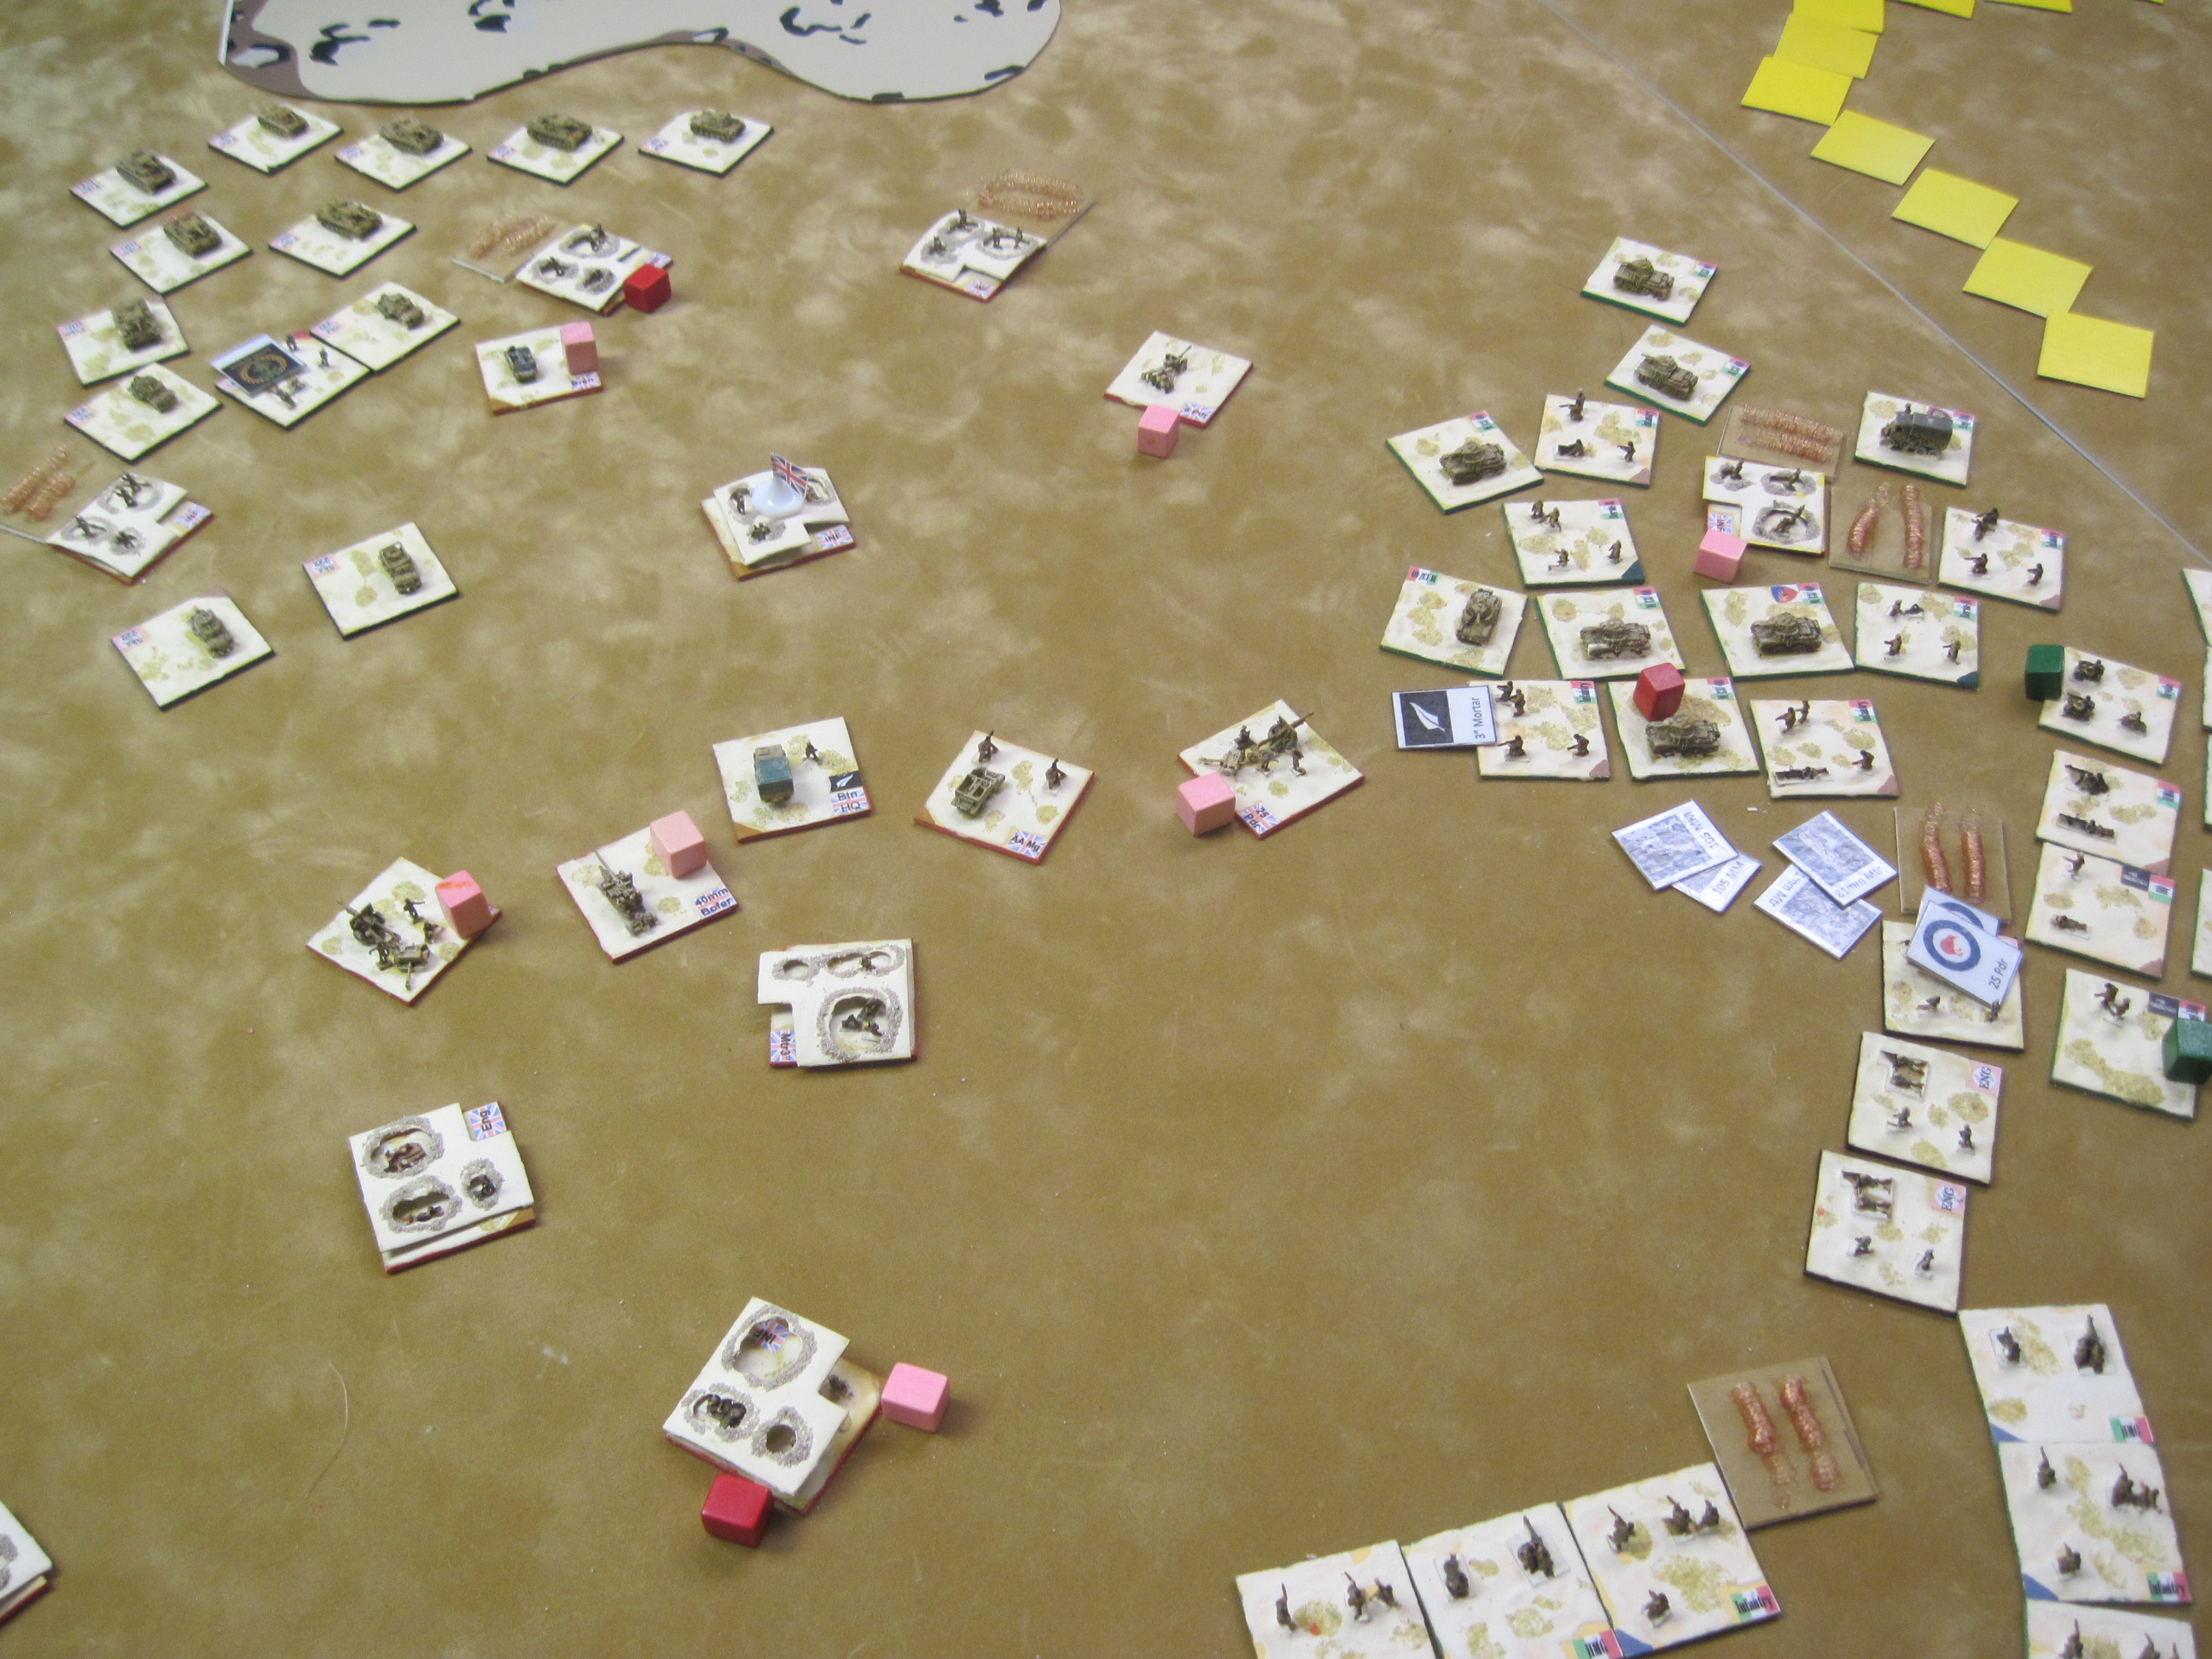
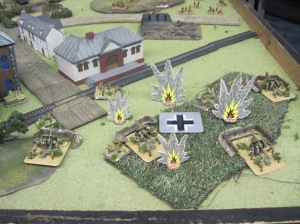
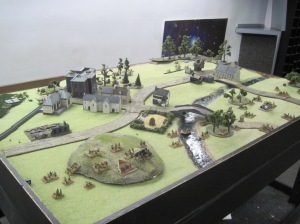
The table was rolling contoured terrain built in so it’s not evident in the picture. A stream ran in the lower corner which we played as delaying terrain only. The town at the top left was to become the focus of the battle. I was the nominal defender for set-up, so chose the North (top) side as my pick.


IMG_3787 
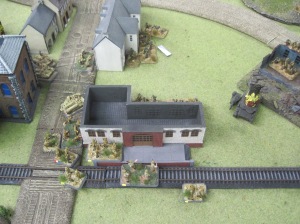
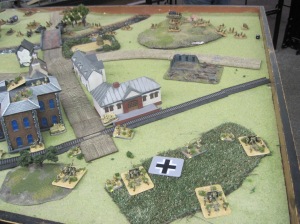
The right side of the map shows one of the placed German objectives. My 18/25pdrs deployed in the high crops. The railroad tracks give cover as a low wall (raised track bed) and may bog vehicles crossing except at the level road crossing. An infantry platoon defends the town to the front of the guns, and a carrier platoon is forward behind the buildings.

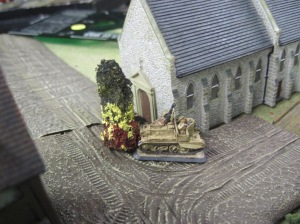
Two German infantry platoons deploy opposite, with one British objective on the hill top almost directly across from the German one. A lone 88mm gun set up at the top of the hill near the objective.

IMG_3789 The right side of the board from the German lines show a British objective (blue Newcastle Brown truck) behind a wood. German PaK 38s deploy near it with Nebelwerfers behind. To the far right are PaK 36s.

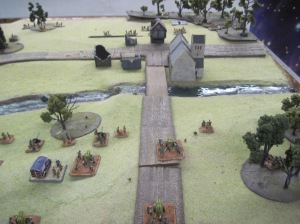
The British have deployed an infantry platoon near the German objective just north of the church. Two 2pdr AT guns are deployed in the woods to provide covering fire. A carrier platoon lurks near the left behind the village.


IMG_3791
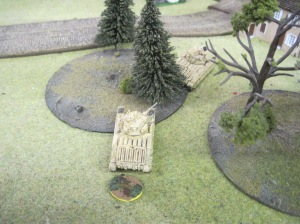
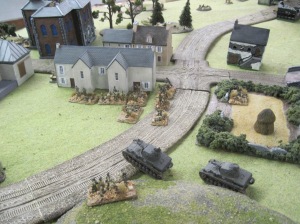
The Matildas went near the center as did  the German MkIVs.


The British are the attacker for the first move, so there will be no artillery this round. The left infantry platoon and the 2pdrs dig in, so the left is done. The carriers move to the left to use the buildings to block  the sight of the PaK 38s. On the right, the 18/25pdrs dig in (Tyson didn’t like that roll!), but the infantry does not. There is no other British action.

In the German turn, the Nebs, PaK 38s, and the 88 all dig in. Tanks and infantry move forward on the German left. The PaK 38s fire at the Matildas at long range and score two hits which bounce from the heavily armored targets.

IMG_3795
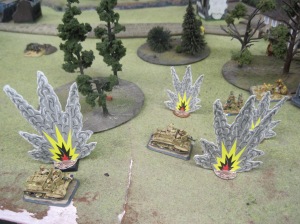
The nebelwerfers drop a double-wide barrage on the Brit artillery and score three hits on artillery and one on infantry. The lucky guns and infantry all save as they are gone-to-ground. The 88 tries to range in on a British gun but misses.


Turn two starts with a familiar beginning as I can’t unpin the guns or infantry, even with a command re-roll. (I AM the Diceman…do not attempt this at home). The mortars and infantry do manage to dig in.

IMG_3797I move my tanks to the right to threaten his advance, but my dice luck continues as one of the Matildas bogs down on entering the woods. The carriers on the right advance to shoot at the German infantry. They score three hits and kill one stand. The Matilda misses the German tanks.

IMG_3796 The mortars range in on the nebelwerfers but score no damage. On the left I try a shot with the carriers against the PaKs but fail to roll a 6 when one save is missed.


IMG_3800In the German turn, the nebelwerfers recover and target the mortars, killing one. Now with one remaining tube, the mortars are pretty much out of action. The 88 hits a British gun, but bounces harmlessly since the guns were gone-to-ground. On the left, one carrier is bailed by PaK fire. (Tyson and I were both affected by the “can’t roll the firepower” syndrome in this game!)

Turn three continues in my dice-rolling skill: Matilda still bogged, carrier still bailed, infantry and mortars still pinned (infantry with a re-roll!) The artillery, which amazingly I un-pinned, fails to range in on the 88, and the Matilda misses the German tanks again. Good turn!

IMG_3801
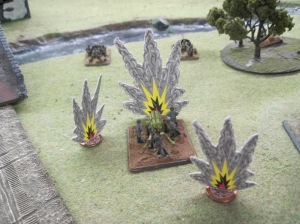
The German push on my right with infantry and tanks. The werfers target the guns..two guns and an infantry hit. The infantry and one gun save and Tyson misses his firepower roll to kill one. The 88 misses the guns totally. In the center the pesky PaKs target the Matilda and gets a bail when I roll a 1 for armor save!

IMG_3805The Germans push…


IMG_3804The bailed carrier on my left is not so lucky any more as the PaKs finally connect.


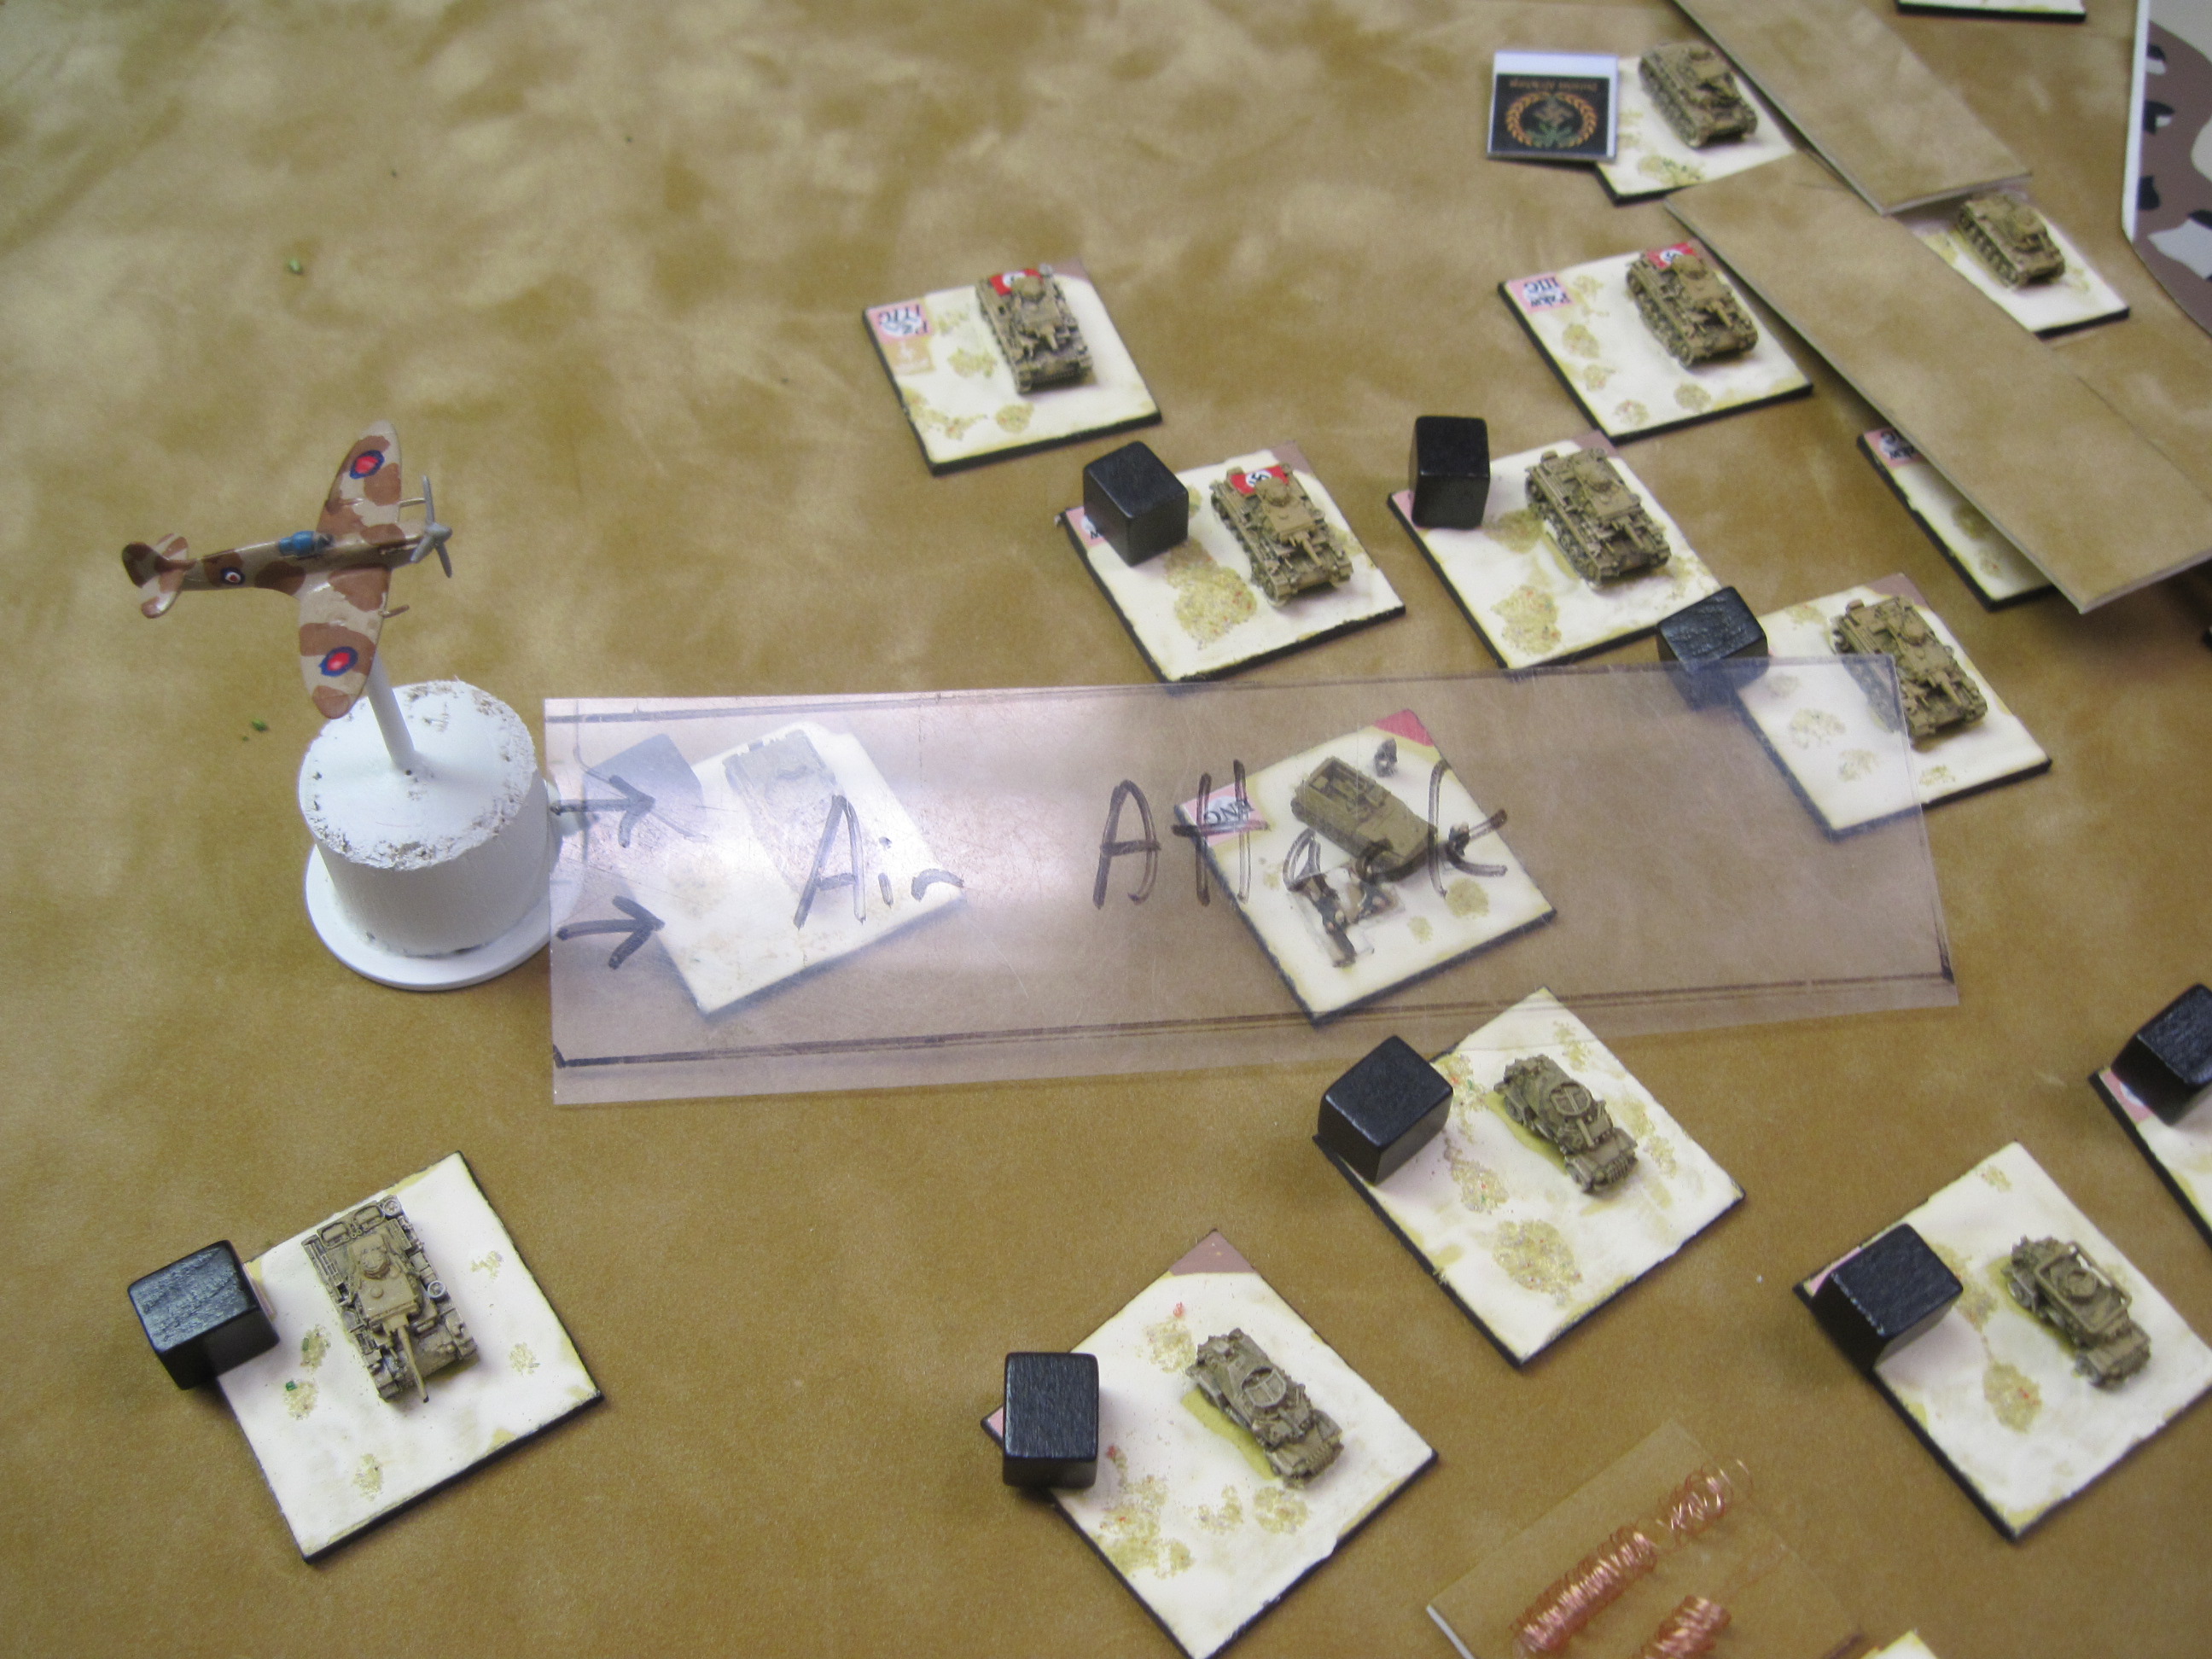
Turn four begins with the guns still pinned (with re-roll….sounds familiar). The Matilda is still bailed but it’s companion frees itself and advances, hoping to get a shot at the panzers. Carriers from the left move toward the center. The pinned guns are now in direct fire range and the panzers go up in balls of fire with four hits. I can’t land a barrage worth a crap, but these gunners know how to shoot over open sights!

The Germans now go defensive. All the infantry digs in. The PaKs, after advancing into the stream, kill the mobile Matilda with a flank shot. (I screwed up and should have faced the guns with my hull and rotated the turret to the right. Then I would have had a chance that he struck front instead of flank. Note to self…remember for the tournament!) The werfers target a carrier platoon, but all targets save.

IMG_3806The bailed Matilda is then killed by the 88. No tanks for either side remain….

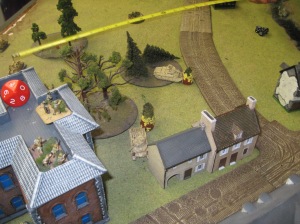
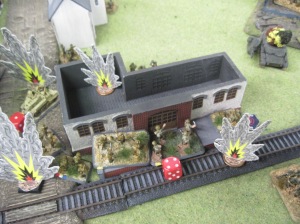
As a side note, the big red poly-sided die is the turn marker.


IMG_3808 
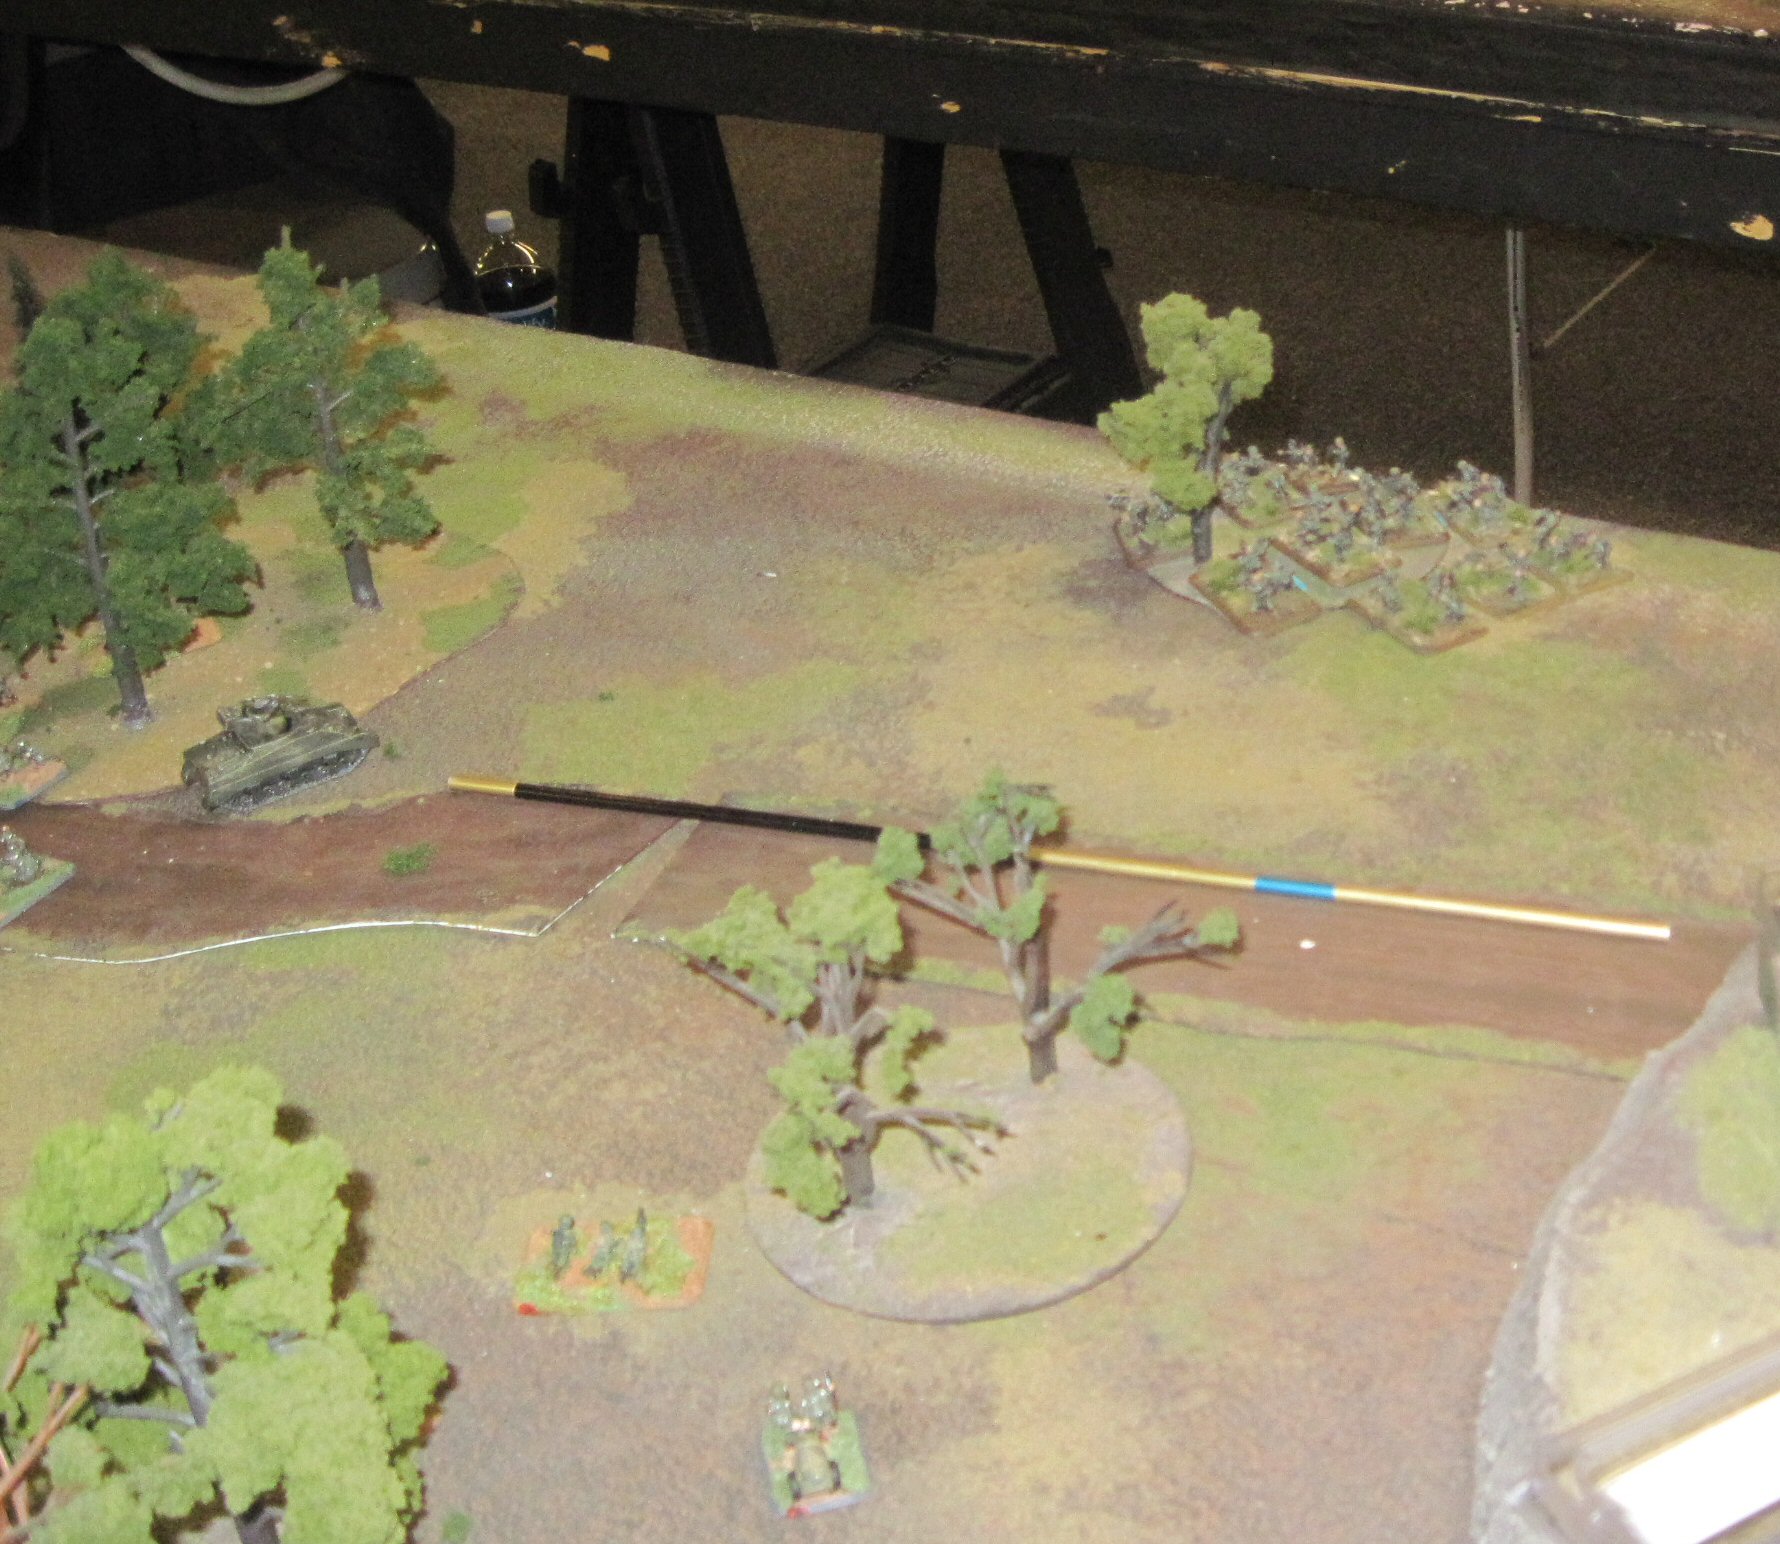
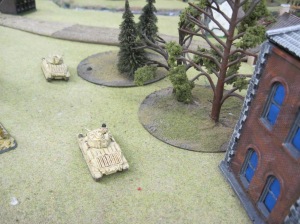
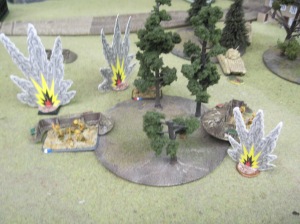
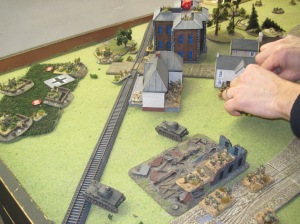
The werfers target a carrier platoon, but all targets save. Here you can see how this board is contoured. The left carrier is higher than the rest of the platoon.


Turn five starts “The Big Push”. Time will make this the last turn for both of us. Neither will be able to win unless we break the other’s army, so this turn will be for victory points. The guns and mortar remains pinned (with re-roll, naturally!) but the bailed carrier re-mounts. My infantry advances to try to knock out a German platoon. MG fire from the carriers and infantry all fail to pin the enemy…having a barrage would have helped here!

IMG_3810 
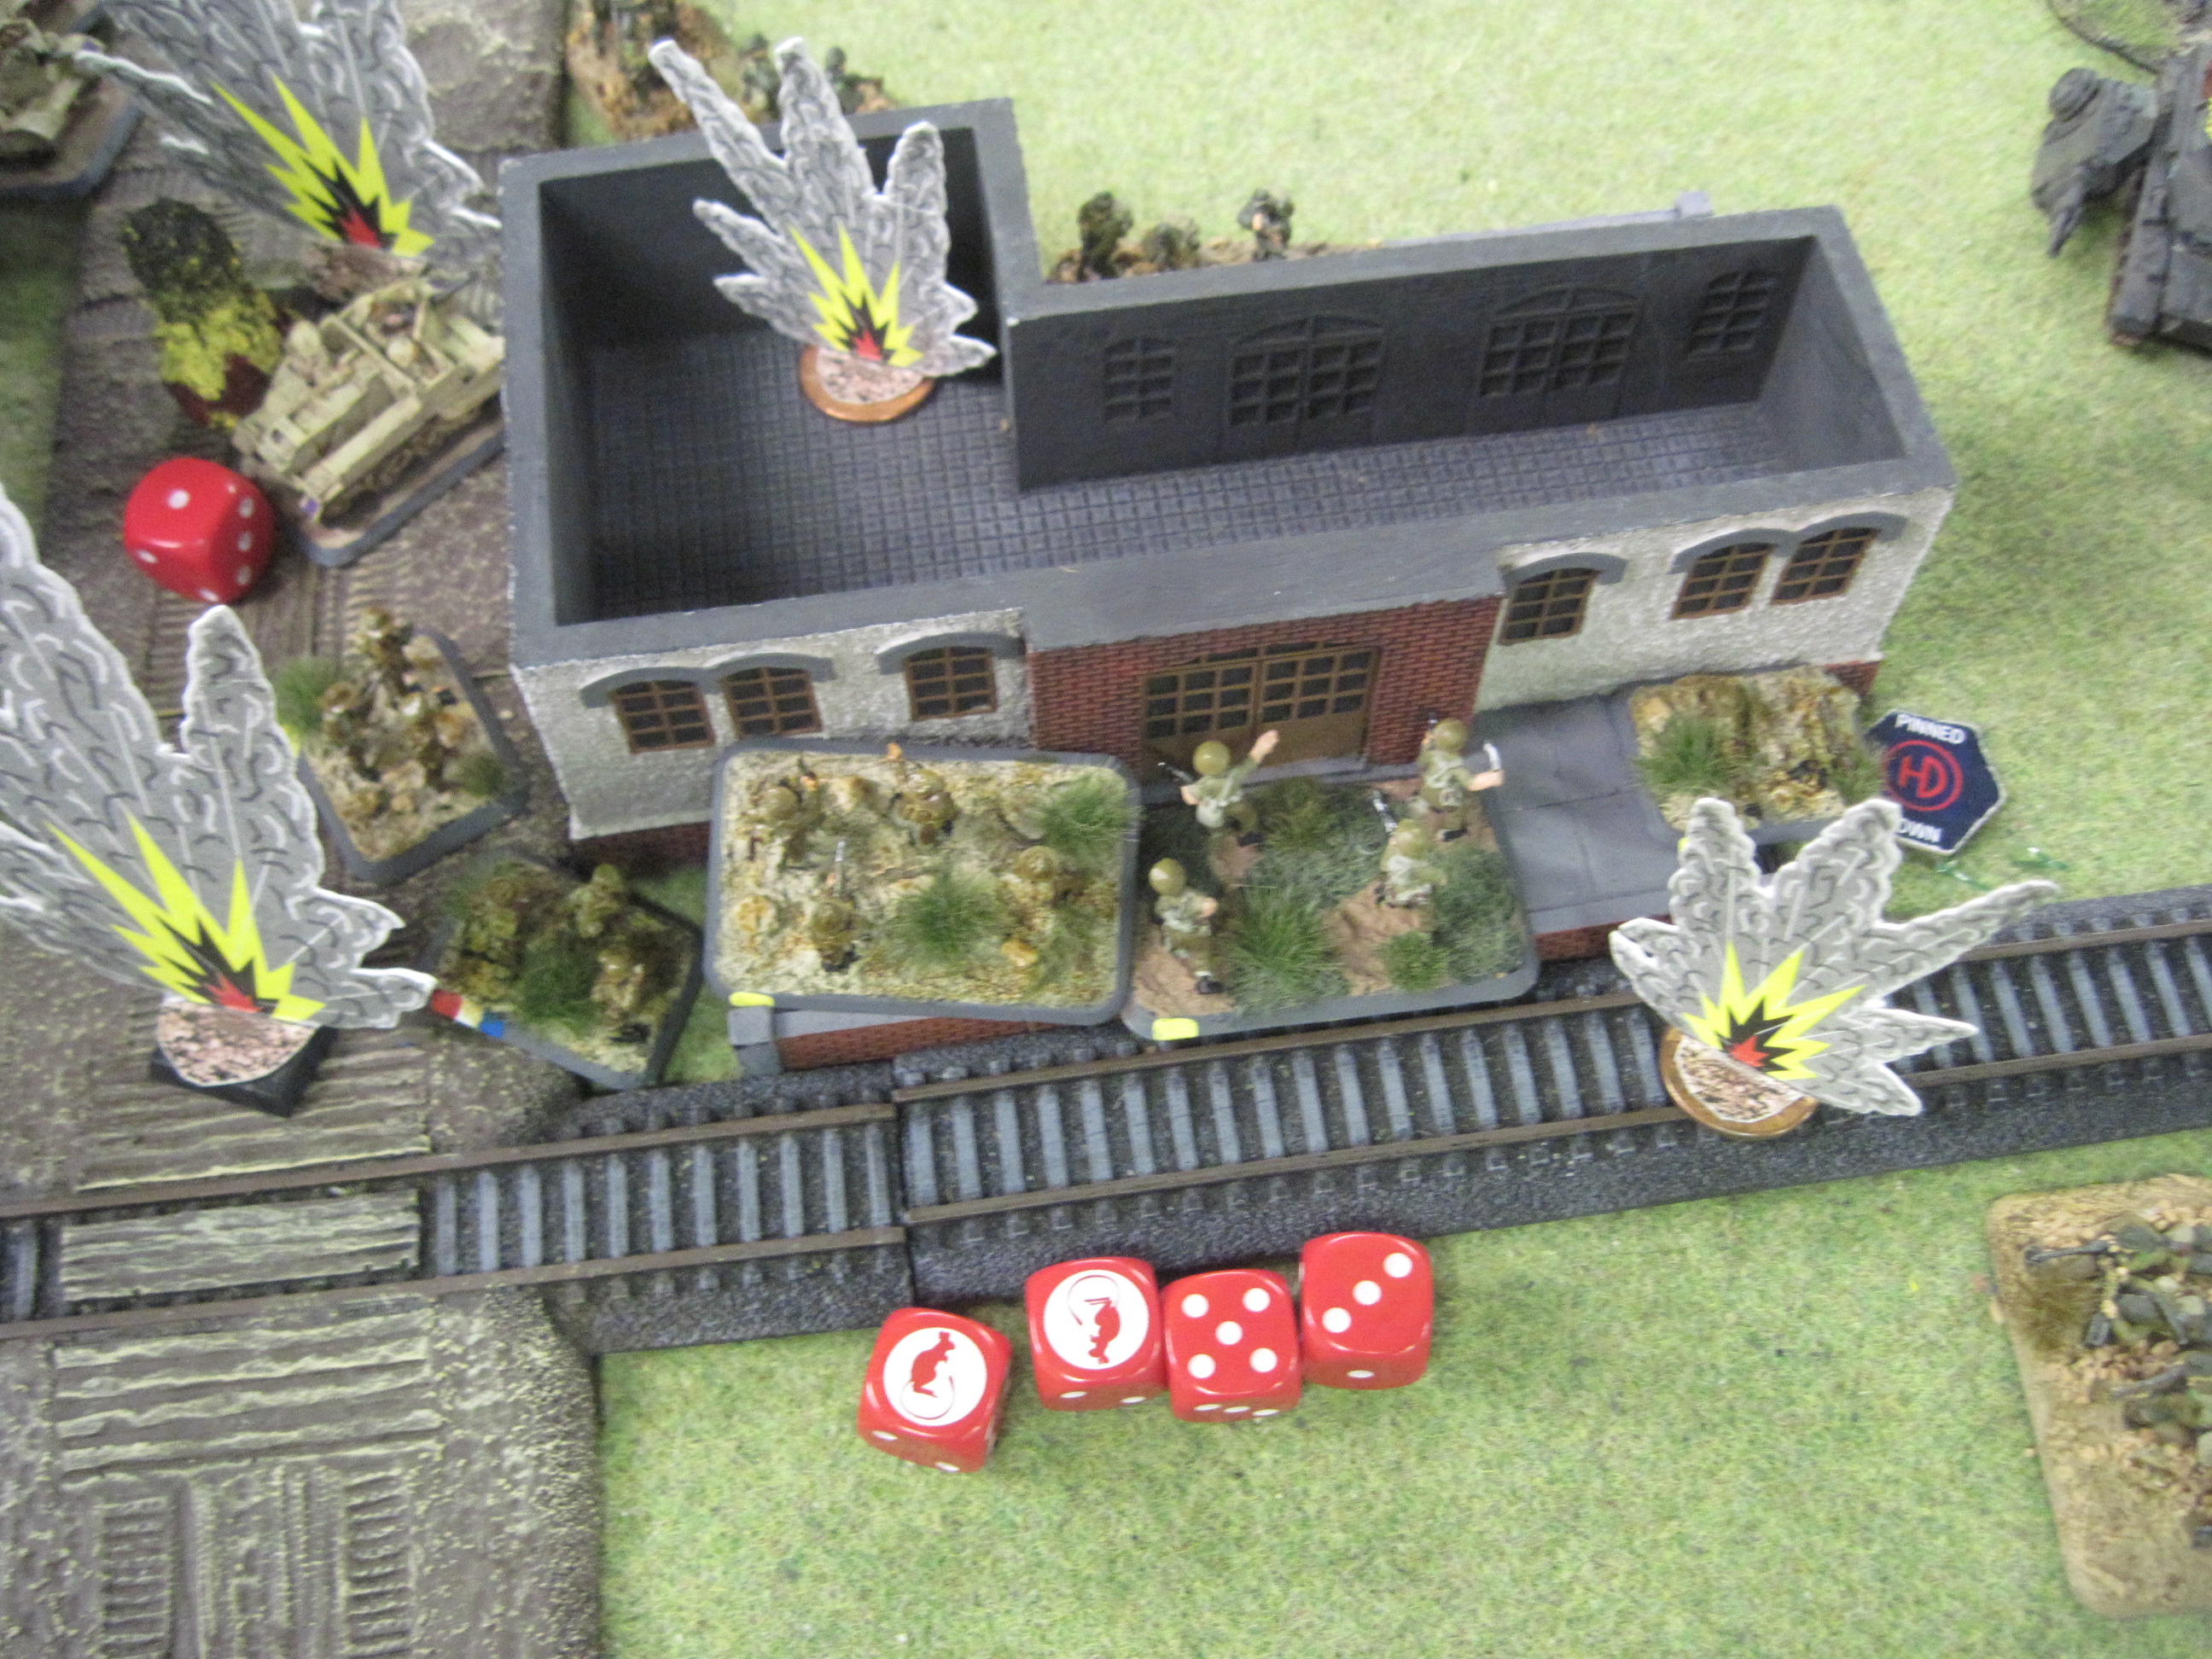
The whistle blows anyway and the Brits charge the railway station. Return fire is massive as the Germans score 11 hits! The plucky Brits only lose one stand, though, but are forced to break off. They then take cover behind the buildings.


The Germans need three stands to cause the Brit infantry platoon to check morale, so set up to try and get a point for that. The 88 hits a gun but the gun saves again.

IMG_3812 The last chance: Infantry MGs take out two. The werfer barrage targets the Brits, needing only one kill for a morale check. One hit on a carrier and four on the infantry. Can I make the saves???


IMG_3813 Sorry, Tyson..the carrier brews up but the infantry all make their saves.

Post-mortem: two well-balanced lists faced off in an even scenario. With all troops on table it would be hard to capture an objective, although Tyson tried hard. My fire was very ineffectual for the first three turns, so I had no hope of capturing an objective. Being continually suppressed, my barrages never silenced his 88 or the werfers. The Matildas had to hide from the 88 and missed all their shots at the panzers and infantry. My idea was to eliminate or smoke the 88, destroy the panzers, then assault through the infantry with carriers, tanks, and infantry. Tyson did much better and almost succeeded in his plan. If we played longer he may have secured his objective.

Good game, Tyson!


A few weeks ago Stephen brought his Germans to face my British infantry in an Encounter mission in the desert.

Stephen in the desert

Stephen in the desert

His list was:

Confident Veteran Leichte Panzerkompanie
HQ- 1Pzr III G
1st Plt 3 Panzer III G
2nd Plt 3 Italian M13/40 tanks
3rd Plt Panzerschutzen Plt
             1 commander SMG team
             6 stands MG teams
             1 light mortar team
             3 Sd Kfz 251/1 half track
4th Plt Heavy Panzerspah 2 8rad
5th Plt 1 8.8cm rate of fire 3
6th Plt 2 15cm SiG33 guns
1500 pts.
………….
My Confident Veteran Brits:
HQ with 2 3inch mortars
2 Rifle platoons (1 short) with Light mortars and AT rifles
2 recce carrier platoons including 2 AT rifles
1 platoon of A12 Matilda Seniors
1 AT platoon of 2 QQF 2pdr guns
1 Field Btty  of 4 18/25pdr guns
1500 pts.
Left side with objectives and deployment.

Left side with objectives and deployment.

Right side deployment with objectives.

Right side deployment with objectives.

The British win the attack roll and dig in the 18/25pdrs. The Infantry didn’t receive any shovels, so they fail to entrench. The carriers move closer to the enemy, taking cover behind the buildings. Stephen moves the Panzer III platoon to the left and calls transports up for the 88mm gun.

Carriers take cover.

Carriers take cover.

Can't see any targets! Move the big gun!!

Can’t see any targets! Move the big gun!!

On turn 2 the Matildas move to shoot and misses. The infantry still hasn’t gotten their shovels so remain unprotected. The artillery tries to hit the 88 with a barrage and fails to range in on the juicy target. The Germans are similarly unable to dig in on their turn…perhaps the desert ground is too hard! The Panzer IIIs with commander double to the left.

On turn 3 the carriers and Matildas take position to shoot at the German tanks.  A “warning shot” from the carrier bounces off the lead Panzer III. The infantry finds their shovels and hides in their new foxholes. Two 2pdr AT guns arrive from reserves and station themselves near the left flank objective. It looks like Jerry is massing to go for it! Once again the artillery fails to hit the 88…how can they miss it???

IMG_3721

Right here, lads! Cover this spot….

Carriers to the left with tanks up the middle.

Carriers to the left with tanks up the middle. We have to be cautious as that 88 covers the gap to the left of the buildings.

The Germans also roll for reinforcements….a platoon of heavy infantry guns take station near the 88 on the right. The infantry finally digs in. The startled Panzer fires back at the carrier…perhaps too quickly as a bail is the only result. All other shots miss.

A little too cheeky, mate. Good thing it didn't hit anything major!

A little too cheeky, mate. Good thing it didn’t hit anything major!

Turn 4 starts with no reinforcements available. The 2pdrs dig in. The plucky carrier recovers but the Matildas all miss their targets. The artillery targets the newly-arrived German guns and finally manages to range in on their second attempt. A gun takes a clean hit and is eliminated.

Incoming!!

Incoming!! Scratch one gun.

In the German turn a platoon of armored cars arrives in the center. Another carrier is bailed by the commander’s tank…maybe I should get them out of there before their nine lives are up?  Half-tracks come forward to pick up the infantry. The 150mm gun tries to kill the Matildas, but the single gun only ranges in on the third attempt and misses.

Turn 5…the mortar platoon comes in on the left. The carrier remounts and the platoon retreats to better cover. The 2pdrs fire at the advancing tanks but miss totally. A barrage hits the half-tracks and also misses. I’m starting to wonder if the heat is throwing off my aim…but the Matildas come through and destroy one half-track along with a crewman,

One half-track is down!

One half-track is down!

In the German turn some Italian tanks show up on the left just where they are needed.They rattle forward and manage to knock out one of the British mortars.  The PzIIIs pull up to their right but their fire is ineffective. The 150mm gun digs in and then slams a barrage on the Matildas again. Luckily, I roll a 5 and the heavy round has no effect. Whew!! The 8rad platoon has a run at the artillery park, hitting with 20mm and MG bullets, but the artillery bounces everything. Unfortunately they fail their Sturmtruppen move…

Turn 6 and another carrier platoon arrives just where I need it and takes positions near the artillery. The artillery gunners fire directly at the German armored cars and brew one up.Artillery versus armored car...

Artillery versus armored car…

On the left, the 2pdrs fire at the Italians and their 5 hits result in two dead tanks. The platoon makes it’s morale roll and soldiers on. The Matildas are not so good in aiming and only bail a MkIII.

Two Italians on fire!

Two Italians on fire!

The German return fire knocks out both 2pdr guns but the platoon commander remains in action amid his destroyed battery. The Panzer crew rallies. Infantry heads for the British artillery. A barrage targets the British artillery park and only bails a carrier. Sounds familiar…

The artillery is safe in it's entrenchments but the carrier is bailed.

The artillery is safe in it’s entrenchments but the carrier is bailed.

Turn 7 is very uneventful for the Brits. The Germans can attack this bound, so I hoped to do some preemptive damage. The turn results in a bailed MkIII and a half-track shaken when an ATR round bounces off. One hit with 8 dice rolled versus the tracks! Ackkk!!!

Crunch time. The Germans attack on the left with tanks and on the right with infantry.

The German tanks roll into the British infantry.

The German tanks roll into the British infantry.

Five stands die in the assault. The Brits were too dazed to hit anything, and are swept from the field when they fail morale. The loss of the AT battery had sealed their fate the turn before.

The German infantry assault falls back in a hail of defensive fire.

Turn 8 and the infantry and artillery are still pinned. I advance the Matildas in a last-ditch chance to kill the MkIII platoon now controlling the objective….and miss a bail chance. On the right, the carriers attack the infantry in the open and the combination of prep fire and assault kills all except one stand…and the platoon passes morale. The Brits go down to defeat! Stephen the Desert Fox wins 6-0.

German infantry before they are decimated.

German infantry before they are decimated.

The final score was really strange. The Matildas were a total waste, only killing one half-track in the whole game. The artillery was ineffective as well. The key to the game was my missing saves on both the AT guns and Stephen converting them both to kills. Stephen had FIVE 1-stand platoons left at the game’s end but I couldn’t get the last stand of any for a point or two! Good show, old man!

December 13 was the Flames of War  Christmas Fest at Legions Games. In the “spirit of giving” for this time of year, this event was a little different. From the event description: “Make a Mid War list of a MINIMUM of 600 points that is the absolute worst list you can come up with. You will be giving that to your opponents to use. Your opponents will give you their list for you to use. Your force composition only needs to have one Combat platoon (instead of the usual two). 600 points is the minimum number of points that you can bring. You could go over if you want, but remember, you will be playing against your list for all three rounds.

The event will last for three rounds. Every round will be Free-for-All and will be played on 4’x4′ tables.”

So it’s “screw yer friends for Xmas!!!” Bah, Humbug!! I love it!!

My “gift” was:

FoWXmaslistSince the AT guns are “no HE” weapons, they function as very expensive rifle teams (although the portees do have a vehicle MG).

I had three fun games using crap Soviets (one unit had NO rifles!!), Germans and American OSS. I won with Soviets and Germans but lost with the OSS. My army was crappy, but not as crappy as Shane’s!!

Here’s some pics:

IMG_3673Captain America objective.


IMG_3675IMG_3677IMG_3684IMG_3679

The FoW gang met at Legions Hobbies on Nov 22 for Tanksgiving! This is a free-for-all battle where each participant fields a tank-only (must be fully tracked and have at least “0” armor) list of 750 points all from one nation. For example, I fielded a Tiger II, 2 Jagdpanzer IV (long), and 2 Veteran tank hunter Raupenschlepper Ost with PaK40. One of the Jgpz IV was trained, all else veteran. Most of the players were very conventional with several Tiger IIs, “Jumbo” Shermans, Panthers, a Super Pershing and a JgPz VI (“cheater” Tim!), but Neal fielded a colorful unit of mixed tanks from “Girls und Panzer”, a Japanese anime feature. (Sorry, no pics!)

The bad weather (rain and ice) prevented three of our guys from the South of Pittsburgh from arriving due to many accidents on the roads, including the TO Tim McClelland. The bad weather was all south of us, though, and the two guys from Erie had no troubles. Tim called and said they were OK, but not being able to make their way to us. Since we had enough to play, Tim Hladon stepped up ably ran the event.

Basically, the players pick an edge of the 8’x 8′ table to setup on. The order is determined by a card pick from a regular deck of cards. Each round the players move and shoot when their random card is drawn. The only restriction is that on the first turn you may not shoot at either of your nearest neighbor. After that, all bets are off and it’s kill or be killed. Last man standing is the winner!

The table before we set up:

20141122_124135


And another view:

20141122_124447


Now we started to pick setup areas:

image1


Fitzi’s Panthers hide in the woods…

20141122_124417


Scratch one Sherman!

20141122_125447


The mayhem went on for several hours until we called the game with 3 players remaining. At that point, Larry Stone with a Super Pershing and regular Sherman left) had the most points and couldn’t be caught by the rest (Larry Chaban with one Jumbo; and yours truly with a Tiger II, vet JgPz IV  and a RSO). If you wonder why I had so many still alive is because I spent most of the game BOGGED in the woods! I couldn’t shoot, but no one could shoot me. I swear I rolled 8-9 1’s to bog my tanks….

Larry Stone…the Tanksgiving Champ! The big prize he’s holding is a gift card for Legions.

20141122_164853


Thanks for all who came and played…it was a lot of fun! And big thanks for our photographers Rob Gerdich and Larry Chaban….

On Friday Nov 14, Bill Thompson brought out his Fallschirmjagers to match against my US 101st Airborne at Legions Hobbies.

Bill Thompson and his 1750pt list:

IMG_3619Falls1


My list was Parachute Rifle Company (101st with 11th British):

Para101


Bill chose the SW corner of the heavily wooded terrain to defend in. The Belgian woods were interrupted only by roads and clearings. No towns were located in this area. I chose to attack from Bill’s right. This pic shows Bill’s deployment area in the upper right and the two objectives in place. The sticks placed in the left of the picture are the limits of my deployment area.

IMG_3617


Bill put his 3 StuGs in ambush and left one infantry platoon off-board for a reserve. These decisions proved to be key in the following battle.

He attached one HMG to each infantry platoon to beef up their firepower.


His deployment is shown:

IMG_3618


My deployment:

IMG_3620My plan was to use the tanks and mounted infantry to take the objective to the NW.

The Recce troop dismounted into entrenchments to remove his Gone-to-Ground status. I thought I needed that edge as his infantry was all Veteran and I had the first move. As it turned out, it may have been a better choice to use them with the tanks. Try to get tricky and get screwed…


The British Heavy AA guns deploy near the center.

IMG_3623

Turn One began with the arrival of two P47s. The Recce removes GtG on the 1st infantry platoon and the PaK40s…a good beginning for me! But next I had to shoot (and roll dice.) The tanks moved toward the objective, wary of the still-hidden StuGs.


The P47s go for a target-rich environment:

IMG_3625


The combination of my infantry platoon, all my LMGs, and direct-fire mortars resulted in a grand total of ONE dead infantry stand and ONE PaK40! The 105s range in on his Nebelwerfers, landing on the THIRD attempt and pin the platoon and nearby AA guns. To top it all off, the plane gets shot down!!

Bill rolls to hit the plane:

IMG_3626


And then to kill the plane:

IMG_3627

I can see it’s going to be one of THOSE games!!!


In his turn, Bill unpins everyone. His werfers target my 105s and takes one out:

IMG_3629


The Heavy mortars target the infantry platoon with no effect as I make all my saves.

IMG_3630

His rifle and MG fire does kill one stand after the barrage lifts.


Turn Two starts with me unpinning all units and getting two more P47s, who target a heavy mortar which is out of sight from the AA. The mortars and infantry fire are all fails, as Bill saves for all targets hit. The remaining 105s continue to fire at the werfers and take one out:

IMG_3632

The P47s scream in on the mortar and spot it in the tree line. A bomb on target takes it out.


The German turn sees the arrival of an infantry platoon from reserves, who take cover in a small woods surrounded by a lot of open ground. Those British tanks to the left  and the Engineer MGs at the bottom of the picture are pretty menacing…..

IMG_3633

Bill unpins everyone except the werfers . All his other fires result in pinning the lead American platoon and killing one stand. The HMGs come close to killing the Recce .50cal, but he fails the Fire Power roll.


Turn Three begins with a single  P47, and the infantry unpins. The 105s continue to bombard the werfers but all shots miss:

IMG_3635 The P47s target the reinforcing platoon. The tanks and Engineers move within close range and also target the platoon. When the dust clears, the plane failed to see the infantry but the MG fire cuts down two stands.


The German turn sees some movement toward the Americans still moving toward the objective. The StuGs remain hidden. The heavy mortars range in on the American mortars, killing one mortar and the platoon commander…the remaining mortar saves with a 6 for morale…whew!

IMG_3636Bill’s HMGs and infantry fires take out an infantry stand and a Recce .50 cal with an impressive bunch of 5’s and 6’s needed to hit.


Turn Four gets 2 P47s. (Wow!! I NEVER get this many planes in a row!!) My fires this turn are totally ineffective..the continuing barrage misses as do all other firing! At least the plane succeeds in taking out one of the German HMGs:

IMG_3637


Bill fails to unpin his HMG platoon, but all else is combat-ready. The pinned HMG takes out a bazooka, and the HMG attached to the infantry rolls 4 6’s and kills a stand. The moving Second platoon (near the objective) loses a stand also. The deadly 120mm mortars land again on the American mortars but miss when I save with all my rolls. His werfers try to hit the tanks after a moved PaK failed to penetrate the Firefly and bounce off the tanks when I roll a 5 and 6.

IMG_3638


Turn 5, 2 more planes (OMG!) The planes target the PaK40 which tried to snipe the Firefly. All my fires prove that I’m using bad ammo…EVERYTHING misses. The planes hit the PaK40 and an infantry stand. I miss the infantry by rolling a 1! The PaK , of course, makes his save…

IMG_3640


The Germans move in their turn to secure the objective, and bombard the mortars and Heavy AA guns to no effect. The reinforcing platoon takes out one of the Engineer stands, though.

At this point we called the game 6-1 in Bill’s favor, as I thought I couldn’t take the objective with the time remaining in the game. If he had not contested the objective during his move I would have won.

As I mentioned earlier, I think I would have had a better chance if I had kept the Recce platoon mounted to help shoot the Germans away from the objective. My inability to hit the reinforcing Germans over three turns was also critical as I spent too many resources to try to get a point. Bill’s ambush was never revealed, and this threat also hampered my attack. The 105s were singularly firing bad ammo. Consider that there were 2-3 stands under continual barrage for SIX turns which resulted in only one stand eliminated and one turn of pinned werfers.

Well played, Bill!

At Fall-in I picked up some of Eureka Miniatures’ Gurkha figures to add some variety to my Battlefront Flames of War troops. There are 1-4 figures per pack, with 26 different codes available! This extensive range allows you to model these troops from Early to Late War and support weapons (Vickers HMG, AT rifles, 2″ mortars) are included. Infantry prices are 65 cents each, Vickers and crew  or 2″ mortar and crew for $2.70.

IMG_3572


The Eureka figures compare in size very well with Battlefront as shown to the left in a blurry photo (sorry!)


Detail is good, and  is apparent on this photo below 223a, White European Officer of Gurkhas

IMG_3576


Some of the figure are here:

IMG_3568Battlefront figure for comparison; European officer; Infantry with slouch hat and Mk4 rifle; Gurkha officer; and Radio operator.


More of the line:

IMG_3570 Infantry with Mk4 rifle and khukri knife; NCO with Sten; and Infantry with Thompson SMG. Most figures have slouch hats or helmets as choices.


Here’s a closer view of some from above:

IMG_3575


My verdict:

Great figures which will easily mix with Battlefront to give some good variety to existing platoons. Five stars out of five!

Figures are available at: Eureka Miniatures USA


Sunday November 2 found us at Eric Streicher’s place for a WWII desert battle using 1:285 figures and the Spearhead Rules.  Each stand represents a platoon of infantry or armor. The ground scale is 17.5 inches represents a mile.

I was the defending New Zealand infantry (with help for a while by Keith) and Eric’s Brit armour was to be the arriving cavalry. Father and son Vince and Doug were the Italian and German attackers.

IMG_3501Eric and Keith survey the right flank. The yellow counters are minefields. Some are dummies which are revealed when an attacker tries to enter. Two New Zealand battalions reinforced with tanks, artillery  and AA are to the left and right of the “v” shaped minefield. The terrain is mostly flat with several patches of rough ground and depressions, one of which is visible in the center of the picture.

IMG_3504The Diceman (yours truly) played the New Zealanders in the center.

IMG_3502


Vince and Doug plot how the Italians (on the far left and center) will attack the Kiwis. To the far right is the German armor. The Axis forces know that British armor will be arriving behind them, so must decide what to use to delay their approach and how much to devote to eliminating the defending infantry.

IMG_3503


This view shows the table at start, with the Italians in the lower left and German tanks in the upper right. There are some German infantry in the top left. Morale ranged from Green to Veteran on the Axis side , and was Veteran for the UK forces.

Random air support could happen on dice rolls, and the arriving forces were also determined by dice roll.

Lucky for the Allies, planes showed up on the first turn. Unlucky for the Allies, so did German planes! After a quick dogfight, the Brits secured the skies and attacked the Axis troops but had little success.

IMG_3505The Cavalry arrives! Eric gets the Brit reinforcements to arrive early. A supporting British airplane still loiters near the Germans in the left corner of the picture. Doug assesses how much to devote to the armor threat.

IMG_3506


The Italians move at full speed, trying to flood the defenders. A few minefields slow the attackers for a while. The New Zealanders hold fire for as long as possible, hoping to avoid detection.

IMG_3507


Here’s a closer view of the Italian attackers. Eric IDs each stand to help keep battalions together. The two artillery counters will be placed on targets when they are called in by the spotter.

IMG_3508


The New Zealanders move some tanks and 6pdr portees from the right flank. Full-speed vehicle movement throws out a concealing dust trail as seen here behind the left vehicle. Eric has entrenchment overlays for the infantry stands as seen in the right of the picture.

IMG_3509A Hurricane attacks the German armor near the center of the battlefield. We use the blocks to indicate movement. Dust trails can be seen in the upper right.

IMG_3510


After the German and Brit armor fight to a standstill in the Northeast, the crucial moments for the New Zealanders arrive. In a few turns, they are overrun!

Game goes to the Bad Guys this time…time for tea!!

Friday afternoon at Legions Hobbies I met up with Jim Naughton for a 1750 Mid-war game. The scenario was to be “Fighting Withdrawal” and my Brits were the defenders.

The Brits had 8 platoons: 2 Ghurkha infantry platoons, 3 Churchills, 3 Crusaders, 2 Bofors AA guns, 2 6pdr portees, 4 25pdr artillery battery, and an Allied 155mm US artillery battery. A  P40 provides sporadic air support.

Jim’s Germans fielded 9 platoons: 2 MG Infantry platoons, a Heavy platoon with MGs and mortar section, a Heavy 12cm mortar platoon (4 tubes), 2 light SP armored AA half-tracks, 2 SP 15cm Grilles, 2 StuIG33B, 4 Marder Is, and a battery of 3 Panzerwerfers with extra crews. An HS129 provided limited air support. One 12cm mortar was grouped with the 8cm mortars to beef up its firepower. One Marder was detached and added to another platoon.

IMG_3423  The battlefield shows the objectives with mine in the center and Jim’s to each side. A vital part of this scenario is that the defender gets to remove the attacker’s objectives at certain turns during the game. The minor stream bisecting the board is slow-going for vehicles.


IMG_3426  My objective is the 2014 Nationals “Home Guard” objective painted as a Newcastle Brown Ale delivery truck!


On my right flank I deployed an infantry platoon, a battery of 25pdrs, and the Crusader tanks were hidden behind the woods.

IMG_3430

Churchills, an infantry platoon (which stretched to cover the left objective), and the AA platoon guarded the center. Hopefully the AA could provide air defense over most of my troops.

IMG_3432


To the left was the battery of American 155s deployed in the vineyard and woods. One of the Churchills and part of the infantry platoon also help cover the left objective. The 6pdr AT guns were held in ambush.

IMG_3433


The German left (from the British position) had a Panzergrenadier platoon in trucks, 3 Marders, and the pair of StuIG33Bs.

IMG_3434


The German center had the Werfers, mortars, the Heavy platoon , the SP AA guns  and the Grilles.

IMG_3435


On the right were the 12cm mortars and an infantry platoon.

IMG_3436

The Germans had the first turn and moved aggressively on the left with the Panzergrenadiers advancing quickly on the 155s. The British P40 chased the approaching HS129 away!


Four batteries of mortars, rockets, and guns hammered the Brits….

IMG_3437Multiple barrages hit the woods near the vineyard to pave the way for the imminent German attack.

For once I rolled well, only losing the American staff team for the artillery. On my right, a mortar barrage took out the commander of the 25pdrs.

My turn saw the arrival of a few P40s, who attacked a Marder lurking near the Werfers. This target was behind some woods which screened the plane from the German mobile flak. The 155s ranged in on the Panzergrenadiers but was ineffective. The 25pdrs remained silent as they were still pinned. The plane managed to range in and avoided all the local AA fire and miss the Marder but only bails a Werfer!

IMG_3443

Turn two marks the arrival of a pair of HS129s who target the Brit left. The German artillery is not as effective this round as the Werfers and Grilles both fail to range in. One infantry team is lost to the 12cm mortars on my left. The real damage comes from the direct fire from the Marders and StuIGs when two of the US 155mm guns are destroyed. To add insult to injury, the pinned Bofors guns totally miss the attacking planes which kill another 155 and bail a Churchill! With all the damage on the guns, its not surprising that they fail their morale check and bug out.

IMG_3445


The British turn begins with no air cover but the 6pdr guns appear in the woods near the vineyard so recently vacated by the American guns. In a pretty wretched display of gunfire the ATGs and Churchills only manage to kill two Marders and bail one, missing the StugIGs totally.

IMG_3446


IMG_3447


In turn 3, a barrage kills one of the 6pdr guns and bails a Churchill. The rockets miss again, and the 12cm mortars have no effect. No other combat occurs, although the German infantry closes on the AT guns and Churchills. I must withdraw a platoon this turn, so elect to pull the AA guns off. All my units unpin for once! A 25pdr barrage targets the advancing infantry, killing one.

IMG_3448The tanks also take a stand out and the remaining 6pdr misses his shot at the StuIG.

Turn four sees no German planes.The infantry rallies with the needed help of the Company commander…curses!!

The barrages hit again against the 6pdr and the center objective. The rocket strike takes out the last 6pdr, but the remaining platoon commander makes his check and stays. Now comes the crucial infantry attack. I totally miss with defensive fire and the charge takes out my Company commander and the 6pdr platoon leader. The panzerknacker-wielding German leaders kill a Churchill when I manage to roll a 1 and 2 for armor saves. The bailed Churchill nearby (of course I had failed to remount even with a re-roll!) is captured. The remaining Churchill fails morale and the platoon is gone.

IMG_3449

OK, it’s now or never! I don’t have to withdraw a platoon as I have four, so get a delay counter. The Ghurkha infantry rallies and readies to charge. The 25pdrs lay a perfect smoke screen to hide their approach. As it turned out I forget to move my Crusaders toward the center and really hurt my chances for a win. I think I assumed the infantry would be slaughtered before I could remove the objective.

IMG_3450  The German tanks are screened from shooting at the Ghurkha attack by the smoke barrage.

The attack goes in!!

One stand falls to defensive fire, but the wild Nepalese eventually  kill every German left standing in the wood…five stands KIA!

Turn five’s German barrages are mainly ineffectual, killing one infantry stand. The mobile AA destroys a 25pdr gun on the right. The StuIGs and command half-track charge the Ghurkhas. The half-track bogs on the way in, but the two StuIGs charge in. One is killed in the combat, but the infantry is eliminated.

I make my company morale check, but we call the game at this point, allowing a German 6-1 win since he had 9 platoons. I had pulled most of the infantry off the center objective to attack the left objective and my failure to move the Crusaders would allow the Germans to take the center objective next turn. I didn’t think I had enough time remaining to contest or hold the objective.At that time I only had one mobile platoon (the tanks) as the infantry was still pinned by the prior barrage.

Good game, Jim!


Friday evening (8/29) at Legions Hobbies …another challenge! To get ready for our up-coming tournament, I challenged Tim McClelland to a battle. It was to be Late War, 1650 points with no more support platoons than combat platoons.

TimsMech

Tim’s Confident Trained Kampfgruppe.

IMG_3174

And Tim himself!


My British from Road to Rome, all Confident Vets:

BritInf1gif


The terrain was familiar to the defending British who had been attacked by an armored Panzergrenadier unit the week before. After a short rest while damaged equipment was repaired or replaced and new recruits brought “up to snuff”, the cheeky Jerries attacked again! This time the mission was Counterattack.  Once again I chose to hold the high ground southeast of the town. Tim deployed due north, knowing he would get the first move.

IMG_3176

The right side of the battlefield, with one of the objectives hidden in the pines. This was the British deployment zone.

IMG_3179

View of the left side of the battlefield. My reinforcements were due to arrive in the corner to the left of the road. The German objective is visible to the right of the crop field.


IMG_3177

My British objective depicts the 51st Highland Division’s “Highway Decorators”. The Division painted their badge on walls from North Africa to Germany during the war. Here the brazen painter works right beside the officers taking tea!


IMG_3178

A battery of 4 25pdrs guarded my right, with a great view to the deploying Germans. A platoon of Churchills held their front.

IMG_3180

Churchills hold the town.


A platoon of Bofors guns guarded the artillery, while an infantry platoon was strung to the left flank and into the town proper guarding the tanks.  6pdr antitank guns covered the thin front from ambush so were not yet revealed.

IMG_3181

The Germans were deployed in a big block, massing on the center boundary to rush toward the objective to their right. The massive armored werfer battery deployed on the back edge, hoping that “der Briitishers” wouldn’t do too much artillery damage until they could spread out a bit.

IMG_3182

The first turn sees the Germans moving to their right. The werfers fire at the British but fail to land a meaningful barrage.


On the British first turn, help arrives in the second infantry platoon! They move quickly towards the objective and take cover in a small woods. Now it’s time for the 25pdrs to earn their pay…

IMG_3185

Ranging in on the second try, the barrage takes out two infantry elements. No damage was recorded on the werfers or the half-tracks under the blast pattern.

The Churchills see a few half-tracks and at long range only manage to bail one.


The second turn sees the continued move toward the German objective. An infantry platoon make for the side of the town with the Churchills. Now the German werfers finally find the target!

IMG_3187

Germans infiltrate the town near the rail crossing.

IMG_3188

The massive rocket barrage (a 12″ square PIE PLATE!) hits the British positions. Fortunately it does minor damage, killing one infantry element, but pinning the infantry and the artillery.


Two of the  75mm PaK40s mounted on half-tracks and two stationary Stugs fire at the Churchills, with the heavy armor bouncing a few and resulting in one bailed tank. Unfortunately for the tankers, a lone Panzerfaust hits from the infantry….another bail and a failed roll kills one tank! Gun fire to my right from a platoon of Sdkfz 251s take out two stands of the just-arrived platoon in the woods.

IMG_3190

Scratch one Churchill!

IMG_3192

The Sherman arrive to help the pinned infantry who still cower from the accurate MG fire of the half-tracks.


In my turn, more reinforcements luckily arrive…a platoon of Shermans with one 17pdr and one 105. They go to work on the half-tracks, killing two. Two passengers die in the wreckage and the platoon fails its morale test. First point to the Brits!

IMG_3193

Tanks versus half-tracks does not go well for the half-tracks.

The third turn begins with the whining scream of a diving Stuka. Herr Rudel (later named “Brutal Rudel” for his game performance) targets the Shermans.


IMG_3194

You can’t hide from the Rudler of the Sky!


The werfers strike again, but only pin the infantry and the artillery. One 25pdr had a close escape because of a failed firepower roll.  Antitank guns reach out to the Shermans and bail the 105. Rudel swoops in and takes out the other two in the platoon. Miraculously the Sherman 105  makes all his required rolls and stays in action….plucky Brit, wot?


IMG_3195

Smoke and flames after Rudel’s attack…the bailed crewman looks at the carnage.


In the British phase, two carrier sections arrive on the threatened flank, zipping behind the burning tanks looking for some cover. All the pinned platoons recover and the 6pdr guns finally show themselves, guarding the town and  covering the approaches to the German  objective.

The 105 Sherman remounts, but is too hasty in his aim and misses everything! The Bofors guns, artillery  and Churchills fire at the Boche in the buildings and score two casualties total.


IMG_3198

The carriers race toward the objective, hoping to win the race before Rudel comes back.

Turn 5 opens with the return of Rudel! The Stugs and Pak40s unload on the 105 Sherman and carriers. The carriers are all missed but the Sherman bounces 4 hits!

(Sometimes I actually can roll big dice). This is all to no avail as Der Rudler rips the Sherman apart…one dead platoon single-handed! A point to the Germans, now.

My turn 5 was ineffectual as everything missed. I must have used up my good dice on the Sherman. The carriers continued their move toward the German objective.


Turn 6 has Rudel appear again. Now he goes for the Churchills. The Stugs and PaK40s fire at the carriers and one exposed Churchill. The tank bounces the shot and the speedy carriers seem to dodge everything thrown at them. This turn Der Rudler is not so lucky as he must venture into range of the Bofors gun covering the left side of the town.  Trailing smoke, the Stuka is seen to go down behind German lines.

The British turn sees no results worth mentioning, although a near miss from a PIAT scared a Stug and the 25pdrs bailed a werfer. A  4.2″ mortar platoon arrives and takes cover in the woods and immediately digs in.

Turn 7 starts with clear skies…Rudel must be waiting for a new plane. The Germans mass fire on the infantry platoon still holding on the British left. The two survivors pack it in and try to reach friendly lines.  The German werfers again pin everything on the hill.

Sensing easy prey, the Stugs assault the now undefended mortar platoon. One  bogs entering the woods. After three rounds of combat, the Germans retreat with two lost Stugs. British Bullshit…errrr Bulldog rules! The dismounted Panzergrenadiers try to stalk the carrier platoon but fail their tank terror test.

IMG_3204

Stug assault fails.


On the British turn, the Churchill platoon leader bags a Stug at long range. The carriers and Churchills savage the exposed Panzergrenadiers, killing 5 stands and destroying the platoon. The last Stug carries on.

Turn 8, no Rudel again. The werfers fail to hit anything. One of the carriers falls to 75mm antitank shot. The mortars seem invulnerable to a hail of MG fire, but the Germans tracks assault them after firing. One track bogs and dies when the mortars repel the attack, going down to only the platoon command stand, who makes all required checks again! This guy is up for a serious medal….

My side of the turn sees a continuation of 25pdr barrage and direct tank fire from the Churchill platoon leader to take out the German Company commander and his track. The mortar commander fails a sole survivor check and leaves the field, looking for his medal.

IMG_3203

Bye bye, commander.

Turn 9 sees no Rudel again. The werfers pound the hill and kill an infantry stand. The infantry and 6pdrs are pinned. Most of the the shots at the carriers miss but one goes down and the platoon flees. The Churchill platoon leader is double-bailed and my roll of a 1 removes the platoon.


At this point we called it due to time. Tim lost 2 platoons.and I lost 3. I successfully defended the town and my large force allowed me a 4-3 close win.

Thanks Tim for the great game! I think your dice were pretty cold for the last three turns and that’s the big reason I edged it out.

I hate Rudel!